
Stories

Located on the picturesque eastern coast of Vancouver Island, Campbell River is the ideal place for kayakers to enjoy the area's natural treasures. The area's majestic mountains, lush woods, and abundance of animals will amaze you as you glide across the calm inlets and inlets.
A Campbell River kayaking promises to be an immersive experience that will leave you in complete wonder of the area's breathtaking coastal scenery. Now take your paddle and get ready to discover Campbell River's natural beauty.
DISCLAIMER: Before traveling to a paddle location, ensure that the location still allows for paddle boarding and make yourself aware of any rules and regulations in place.
Overview of Kayaking in Campbell River
The Campbell River area provides kayakers with an amazing experience because of the rich marine life, serene waters, and comfortable temperatures.
Kayaking Campbell River BC is one of the most famous water-based activities here. The Discovery Islands and the Campbell River estuary are particularly popular kayaking locations. Here, the protected beaches and coves offer a spectacular backdrop and are home to a variety of species, including birds, whales, and seals.
Over ten tour companies provide day trips and multi-day excursions there. In 2019, these skilled Campbell River kayaking guides welcomed over 15,000 kayakers looking to safely explore the area's unique ecosystem and plentiful wildlife.
You’ll surely get unforgettable memories in this dynamic metropolis, from serene paddles through sheltered inlets to thrilling ocean trips.
5 Best Kayak Locations in Campbell River
Campbell River has become a popular destination for kayakers due to its variety of rivers, breathtaking landscape, and plenty of animals.
These are the top five spots in the Campbell River region for kayaking:
Campbell River Estuary
For a tranquil kayak trip, the estuary of the Campbell River is the ideal location because it is teeming with animals. For kayakers of any skill level, the place is perfect due to its calm waters and convenient accessibility.

Photo from Flickr
It’s a one-of-a-kind experience to observe seals, bald eagles, and many bird species while enjoying spectacular views of the neighboring mountains where the river joins the ocean. You must explore the estuary if you are considering a Campbell River kayak excursion. You'll be able to make a connection with nature and lose yourself in a peaceful environment.
Courtenay River Estuary
Conveniently located near Campbell River, Courtenay River Estuary is the next excellent location for Campbell River kayaking. The mix of river and sea waters means that you’ll see a wide range of species here, including seals and bald eagles.
In addition to this, Campbell River kayakers may take in breathtaking views of the Comox Glacier to the west. Experienced kayakers should seize this opportunity to explore the area's maze of channels and inlets. On the other side, beginners may hone their abilities in the protected waters and mild currents.
Lewis Channel
Traveling north, you will come upon the stunning Lewis Channel, a protected strait that runs along Vancouver Island's craggy coastline.
Exploring the Lewis Channel is fun, especially when you find secret coves and inlets and watch the powerful tides change the landscape.

Photo from Flickr
Because of the quiet waters and sheer cliffs, there are also great chances to spot whales, dolphins, and a variety of seabirds.
Remember to include this on your Campbell River kayaking agenda for a fantastic experience in this paradise.
Discovery Islands
The Discovery Islands are a kayaker's paradise, and they may be reached via Campbell River.There are many different types of paddling adventures available in this archipelago, from discovering hidden bays to maneuvering through confined spaces and past cliffs.
Several local guides provide sea kayaking programs around the Discovery Islands for 4 to 8 days. Typically, these trips include camping in the wilderness, acquiring new skills, and wildlife observation.
Desolation Sound Marine Park
Although it’s a little further from Campbell River, as a kayaker, you should visit Desolation Sound Marine Park where there are towering mountains and blue waterways.
With more than 60 kilometers of bays, coves, islands, and coastline, the park offers a unique kayaking experience because of its feeling of peace. You may also see whales, bears, and other species in this vast marine park.
Prideaux Haven, Tenedos Bay, and Grace Harbour are the three primary kayaking destination anchorages in the park. It also has 74 campsites for kayakers to reach and discover its beauty.
Kayak Rental in Campbell River
For your memorable Campbell River kayaking trips, you have two options to optimize your paddling experience.
Reputable locals hire high-quality kayaks and have a fleet of adaptable single and tandem kayaks for you. No matter what level you’re at, you’ll find affordable rental prices offered by Campbell River kayak rentals, along with the inclusion of safety equipment and even a camper kayak rack.

However, for long-lasting experiences, you should own a kayak. In this respect, iROCKER's selection of sturdy and creative inflatable kayaks stands out. The robust and well-made kayak models from iROCKE are a great fit for the Campbell River kayaking adventures with stable, versatile, and portable features.
Other Exciting Activities At Campbell River
Don’t narrow your pleasurable trips to just paddling, you should spend time on other exhilarating activities in this natural destination.
Sightseeing
If you're looking for a great place to see, don’t miss the majestic Elk Falls and the surrounding old-growth forest. The breathtaking Elk Falls Suspension Bridge is also worth it.
Another must-see is the Discovery Pier. It extends into the Discovery Passage and offers fantastic chances to see wildlife and enjoy the environment.
Watching the Sunset
To complete your Campbell River kayaking adventure, watching the sunset as the day comes to an end is an incredibly unique experience.

Photo from Pixabay
The Tyee Spit is an especially gorgeous location to watch the sunset beyond the horizon. Imagine how breathtaking it is to catch the bright hues bouncing off the lake from one of the beaches of the town.
Watching Whales
Naturally, a kayaking Campbell River trip would not be complete without going whale watching.
On specialized trips and from the coast, it's common to see these amazing whales and the well-known Northern Resident orcas.
Don’t hesitate to connect the region's diverse marine life firsthand as you glide over the calm seas in search of whales, dolphins, sea lions, and more.
Upgrade Campbell River Adventure with iROCKER!
Discover the beauty of Campbell River with an abundance of incredible experiences, from breathtaking landscapes and animal viewing to kayaking locations. This location offers something special for everyone, regardless of preference—whether it's whale watching, kayaking in calm coves, or just soaking in the stunning scenery.
Did you know that your Campbell River kayaking will become even more exciting with the inflatable kayak from iROCKER. Durable and adaptable, these kayaks are ideal for calm rivers. Whether you prefer a solo expedition or a tandem experience, they will suit all skill levels and group sizes.
Check out to see how iROCKER's high-performance kayaks fit your next water adventure.

Many paddlers often wonder, ‘is kayaking good exercise?’. Yes. Kayaking, just like any other sport, offers a wide range of health benefits.
You’d be surprised to learn that paddling through the water does not only improve your physical health but your mental well-being as well.
Whether you’re new to the amazing world of kayaking or a veteran on the boat, kayaking is one of the best ways to stay active, healthy and have fun.
Does Kayaking Build Muscles?
Kayaking does build muscles. However, kayaking is not weightlifting. While it does help muscles grow and reduce fat to an extent, it’s not going to magically give you a six pack or a super shredded body.

That being said, kayaking is still an excellent form of exercise. The twisting movement that is required to paddle works muscles in your core, back, arms, shoulders, and legs.
It’s what makes paddling on a kayak good exercise for the muscles because it helps to increase endurance and tone them over time.
When you maneuver the paddle to work against the stream, you’re using the muscles in your arms and shoulders. To balance and brace yourself, you need to engage your core and legs, giving a good lower body muscle group workout.
What muscles does kayaking work on?
So, now you know the answer to ‘Is kayaking a good exercise for building muscles? Let’s break down specifically how each muscle group benefits from this fantastic form of sport.
Upper Body Muscles
The force of water is strong, but it’s what makes being on a kayak good exercise for muscle growth. You will need to actively engage upper body muscles to move against it.
1. Lats
Your lats (latissimus dorsi), the largest muscles in your back, are really put to good work as you paddle. They contract to pull the paddle through the water, propelling you forward. As you maintain stability, the muscles are responsible for keeping your posture upright.
2. Biceps
The biceps work in conjunction with the lats as you pull your arms back and bend your elbows. When performed correctly, these movements can activate the biceps. At the same time, the process of setting up and getting in and out of the kayak also requires you to engage your biceps for better balance.
3. Forearms
The forearms are the key to kayaking correctly as the movements provide grip strength. If you activate a muscle continuously without rest time, it can be counterproductive. Since kayaking requires the harmony of contracting and releasing muscles, your forearms can get toned and develop better resistance to exhaustion.
4. Shoulder
The deltoids and rotator cuff muscles are heavily involved in kayaking. Paddling would not be possible if it were not for the range of motion these muscles provide. Together with the lats and back, the shoulder muscles generate power for most kayaking techniques. Overtime training will strengthen the shoulders and add bulk to them.
- Back
You can’t kayak well with just the use of your arms or shoulders. Your back muscles, particularly the trapezius, rhomboids, and erector spinae, are equally crucial. In fact, the use of other muscles helps strengthen your back, and your back being in the proper position is what keeps other muscles working together effectively.
Lower Body Muscles
If your upper body muscles are given a good workout by generating power for propulsion, your lower body muscles are refined by providing stability and balance while paddling.
1. Core
The core muscles include the abdominals, lower back, and obliques. When engaged, they help stabilize the body. These muscles also assist in rotation and power transfer during the paddling stroke. Kayaking techniques will naturally require your core to engage in order to perform them right.
To properly engage your core while kayaking, pay attention to your breathing and how tight and secure your position feels. You will feel a sense of resistance in your muscles.
2. Legs
You might think that sitting on the kayak won’t give your leg muscles the exercise they need to bulk up. However, the quadriceps, hamstrings, and calves work together to provide a strong base for other actions. You will find that your legs push against the foot pegs or bulkhead for each stroke.
If you prefer an extra boost lower body workout, some kayak types come with pedals.
Is kayaking good cardio?
Not only is kayaking a good workout for your upper and lower body muscles, but it can also be your cardiovascular system’s new fitness best friend. Why is that?

Kayaking can be considered an aerobic exercise (Michael J.S., Rooney K.B., and Smith R., 2008). This is because kayaking involves continuous paddling, making your heart beat faster. The increased heart rate helps with the flow of blood, thus improving circulation.
When your heart beats faster, calories are burned. Thirty minutes of leisure kayaking burns around 180 calories for a person weighing 155 pounds (Hardvard Health, 2021).
As you conquer more challenging waters and paddle more distance, more calories are burned. Depending on your weight loss goal, you can adjust your kayaking route and time as you see fit.
Combined with the use of a variety of muscle groups, kayaking is a very good choice for cardio exercise.
Additional Kayaking Health Benefits
Apart from the physical benefits, many people also believe being on a kayak is good exercise for their mental wellbeing. It’s true.
Here are more wonderful benefits of kayaking.
Stress Relief
Think of the fresh air, the breathtaking scenery and the energy exhaustion your body craves after being stuck at home all week. This perfect mix of physical and mental activity releases endorphins - a hormone that makes you feel good.
So, next time you feel a bit down or overwhelmed, grab your kayak, get out on the water and paddle your stress away.
Improved Focus
To kayak, you need to train your body to coordinate well. The water isn’t always free of obstacles. You will also have to train yourself to think quickly to navigate the rocks, the currents and the changing water conditions. This requires your brain to concentrate, which can be a good meal your brain needs to keep it sharp.
Enhanced Endurance
Is kayaking good exercise to better your endurance? Absolutely.
Kayaking increases heart rate, thus strengthening your heart muscles. To cover the desired distance, you need to use your strength correctly and control your breathing to avoid getting tired halfway, which can improve the capacity of your lungs.

All of these benefits can contribute to your ability to paddle in more intense conditions and cover further distances. Kayak frequently enough and you will find that other similar sports also become easier to master.
Meditative
It’s not always about rocky water and cut-throat currents. When you go kayaking in calmer water, you may find that the evenly paced paddling motion brings a sense of peace. With nature as your backdrop, you will be pulled into a tranquil trance and feel more rejuvenated.
So, Is Kayaking Good Exercise for Overall Health?
Absolutely. There are so many amazing answers to ‘Why is kayaking good exercise?’ You’d be surprised to learn that both the body and the mind can benefit from this amazing sport.
Your upper body muscles, including your arms, back and shoulders, are put to good work as they are the key to paddling and steering the kayak.
To keep your upper body muscles working properly and provide stability, your core strength and legs are also called into action.
In addition, kayaking can also reduce stress and improve concentration and endurance.

Ready to achieve your fitness goal with a kayak? Doing it with an inflatable kayak is even better.
Inflatable kayaks are extremely easy to transport and store, making them as compact as any other workout equipment.
Versatility is also one of an inflatable kayak’s strong suits. Serene lakes, flowing rivers, or wavy beaches - you name it, inflatable kayaks are up for the adventures. It makes exercising with a kayak an even more enjoyable sport.
Ready to elevate your kayaking experience? The iROCKER Inflatable Kayak is designed for stability, durability, and ease of use. Made from high-quality materials, it offers reliable performance and is easy to transport and store. Perfect for both beginners and experienced kayakers, it features comfortable seating and ample storage.
FAQ
Still curious is kayaking good exercise for you? These answers may satisfy your questions.
Is kayaking a good workout for weight loss?
Yes, kayaking is a good exercise for weight loss and body toning. According to Harvard Health, 30 minutes of kayaking (both recreational and whitewater) burns 180 calories, just 36 calories fewer than other sports such as jogging, hiking and wrestling. If you paddle harder or further, you can burn even more calories.
Is kayaking a challenging workout?
Not really, kayaking techniques are quite simple, and the workout comes naturally as you paddle. It provides good exercise for the arms, shoulders, back, legs, and core muscles.
Recreational kayaking focuses on calm and relaxed paddling to enjoy the outdoors rather than pushing the body to the limits. Whitewater kayaking may take some time and effort to be done right, but if you master the basics and have the right equipment, it’s not going to be much of a challenge.
Sources:
Michael J.S., Rooney K.B., & Smith R. (2008). The metabolic demands of kayaking: a review. J Sports Sci Med, 7(1), 1-7. https://www.ncbi.nlm.nih.gov/pmc/articles/PMC3763332/
Harvard Health Publishing. (2021, March). Calories burned in 30 minutes for people of three different weights. Harvard Health. https://www.health.harvard.edu/diet-and-weight-loss/calories-burned-in-30-minutes-for-people-of-three-different-weights

Photo from Flickr
False Creek is a tempting haven for stand-up paddle boarders wishing to escape the city while being located in the center of busy Vancouver. This famous inlet is the ideal blend of urban charm and natural beauty, providing a unique aquatic experience.
As you glide over the calm, safe seas, you'll get exposed to breathtaking views of the city's skyline made up of rocky Coast Mountains, old warehouses, and sparkling glass structures. There are lively settlements all along the beachfront, each with a unique character and convenient access to eateries, retail establishments, and cultural events.
The essential charm of False Creek is in its peaceful, almost remote ambiance, even though it's only a short drive from the city center. For paddlers of any skill level, exploring the urban False Creek paddle boarding will be an amazing experience.
DISCLAIMER: Before traveling to a paddle location, ensure that the location still allows for paddle boarding and make yourself aware of any rules and regulations in place.
Overview of False Creek
Paddle boarding in False Creek—the heart of Vancouver's downtown—is an unforgettable experience. You can enjoy breathtaking views of some of the city's most iconic locations as you glide along the calm and protected waterways.
This 4.5-mile round-trip route offers a convenient way to view another aspect of Vancouver's bustling waterfront. False Creek paddle boarding will be an unforgettable experience, especially when the warm colors of fall foliage or the vivid summer greens surround you.

Photo from Pixabay
Set out from Sunset Beach, this paddle boarding trip will offer you an exceptional viewpoint of the stunning Burrard and Granville Bridges. As you continue, the busy Granville Island begins to emerge. It’s a center for regional craftsmen, restaurants, and the vibrant public market.
While paddling through this renovated industrial district, you will come across the beautiful murals painted on the tall concrete silos. Once you reach the end of False Creek, the unique geodesic dome of Science World will make your False Creek paddle boarding experience unforgettable.
Can You Swim in False Creek?
No, False Creek is not a place for swimming, especially at its eastern end near Science World. Unfortunately, the water quality in this area is among the worst in Metro Vancouver, with significantly higher levels of E. Coli bacteria than advised, making it unsafe for swimming.
According to Vancouver Coastal Health, on June 21, False Creek recorded E. coli samples of up to 4,884 MPN/100mls, which is ten times higher than the recommended limit for primary contact recreational activities like swimming.
However, False Creek is usually quiet and wave-protected, making it an ideal spot for paddle boarding and other non-contact recreational activities. Despite the pollution, many people still enjoy paddle boarding in the area, taking advantage of the calm waters and beautiful surroundings
Paddle Boarding Routes
Now, let's dive into some of the best paddle boarding routes you can explore.
1. Route from Sunset Beach to Science World
You may launch at Sunset Beach and head towards Science World for a spectacular paddle in the middle of Vancouver's False Creek. The False Creek paddle boarding route is around 3–4 kilometers long, so there are a lot of opportunities to stop and enjoy the famous sites along the way.
The Burrard Bridge's iconic green arches welcome you as you set off from Sunset Beach and begin your charming journey through the center of False Creek. As you continue, you'll soon see the energetic Granville Island with its artisan stores, lively public market, and houseboats surrounding the waterfront.

Photo from Pixabay
As you continue to paddle board False Creek, the Cambie Bridge appears ahead, while on your left, the imposing buildings of Rogers Arena and BC Place Stadium come into view. When your journey comes to its end, the famous dome of Science World will eventually emerge, shadowed against the skyline.
On the False Creek paddle boarding tour, you'll be able to witness some of Vancouver's most famous landmarks from a unique aspect and enjoy a peaceful diversion from the hectic city.
2. Navigating Heavy Boat Traffic
Having said that, when paddle boarding False Creek, you should be aware of the several ferries and powered vessels that navigate the creek. Frequent crossings by the Aquabus and ferries create waves that can make the water turbulent and difficult to maneuver.
It's critical to be cautious and maintain a safe distance from these bigger boats. Keep an eye out for their movements and be ready to change direction as necessary. The choppy water they create can cause your stand-up paddle board to become unsteady, so avoid cutting right in front of them.

Photo from Pixabay
You can maneuver through the crowded boat traffic with ease if you paddle with caution and at a steady and safe pace. Being situationally aware at all times is essential for a safe and pleasurable False Creek paddle boarding journey.
Launch Points and Accessibility
Carefully choose your launch site for False Creek paddle boarding, as costs, accessibility, proximity to attractions, and water quality can vary significantly. Science World dock and Sunset Beach are excellent options. Let’s see what they can offer you.
Science World Dock
Access to the False Creek paddle boarding route's beginning is easy from the Science World dock. It's a terrific place to start your adventure because it's conveniently positioned close to the famous Science World building.
However, there are some difficulties in launching with the dock. Because of its design and the state of the water, paddle board launches and retrieves might be challenging. Furthermore, parking close to Science World may be costly—$4.25 per hour. This might raise the total cost of your paddle trip.

Photo from Pixabay
Sunset Beach
Because Sunset Beach is close to the False Creek entrance, it's a great place to start paddle explorations. There are plenty of parking spots and you can easily handle your paddle boards on and off the shore.
The beach itself offers a gentle and easy way to get into the water, making launching effortless. With its more protected waters, Sunset Beach may be the better choice on windy days when English Bay conditions might be erratic.
Selecting a launch site that provides protected waters, easy parking, proximity to key locations, and reasonable fees will improve your paddling experience. And the result? You’ll have an efficient and enjoyable False Creek paddle boarding adventure right in the city.
Additional Activities Around False Creek
Following your serene False Creek paddle boarding trip, several well-known locations in the area are well worth seeing. You’ll get a comprehensive experience, fully immerse yourself in the lively local culture, and make unforgettable memories.
- Granville Island
Don’t miss exploring Granville Island's vibrant atmosphere after False Creek paddle boarding. You should visit the lively public markets where you may try local goods, produce, and handicrafts.

Photo from Flickr
Along with lots of possibilities to thoroughly immerse oneself in the island's culture, there are plenty of intriguing restaurants, galleries, and boutiques.
If you prepare ahead, you may even take part in an enjoyable event like the Granville Island Turkey Trot or a 10K run along False Creek's picturesque shoreline.
- Stanley Park
After you paddle board False Creek, a trip to Stanley Park is certainly a must. When you get there, you should consider renting a bicycle and enjoying the park's peace. The breathtaking city skyline, busy waterfront, and the spectacular North Shore Mountains will capture your attention.

Photo from Flickr
The park's verdant woods, calm beaches, and stunning landscape will leave you with a long-lasting impression every time you paddle board in False Creek. You can also see the well-known blue herons in Stanley Park.
Finally, after your bike excursion, a stroll along the seawall to see the breathtaking sunset across the bay would be perfect for the trip.
Community Centre at False Creek
False Creek Community Centre can help you enjoy the water even if you don't possess a boat. One of the center’s main advantages is that it offers quick and smooth access to the beach.
The community center offers a variety of club activities that allow you to kayak or stand-up paddle board without having to purchase or store your own gear. Here is how their clubs work.
1. Combined Kayak/SUP Club
To become a member of the Combined Kayak/SUP Club, you must finish the False Creek Community Center's introduction to kayaking and basic stand-up paddle boarding courses within the last three years. Before starting, you also need to be able to swim and finish an orientation.
Members of the Combo Kayak/SUP Club who meet the requirements can check out kayaks and stand-up paddle boards for a maximum of two hours each during regular center business hours.

Photo from Pixabay
2. Kayak Club
The Kayak Club offers a comparable choice for those who are only interested in kayaking.
Members of this group are required to have completed orientation and finished the center's three-year introduction to kayaking course.
3. Stand-Up Paddle Club
The most crucial need to join the group is to be able to swim
You can become a member of the Stand-Up Paddle Club if you have finished the required orientation and foundational instruction in stand-up paddle boarding at False Creek Community Center in the last three years.
Best Places To Rent A Paddle Board, Kayak Or Canoe
Granville Island's Vancouver Water Activities is a great place to rent equipment for your paddling activities. In addition to providing equipment rentals of jet skis, paddle boards, and single or tandem kayaks, they also provide introductory training.
Creekside Kayaks is one of the best False Creek paddle boarding rentals. They offer a wide range of single and tandem kayaks for rent, ideal for singles, couples, or small groups who want to explore the entrance.

Also, they rent kayaks and traditional canoes. This will let you and your groups have a memorable paddle experience on the lake.
Jericho Beach Park and Kitsilano Beach offer access to the Pacific's broad seas for those looking for a more serene, picturesque paddle. Rental choices are available from companies like Windsure Adventure Watersports and Vancouver Water Adventures.
Additionally, North Vancouver's Deep Cove and Cates Park, which are only a short drive from the city center, provide breathtaking inlets that are ideal for kayaking and stand-up paddle boarding.
However, for those who want to enjoy paddle boarding without time limitations and always have access to the best equipment, owning your own paddle board is highly recommended. We suggest purchasing an iROCKER inflatable paddle board, as it is known for its superior quality and performance, ensuring you have the best experience on the water.
Enjoy Your False Creek Paddle Boarding Trip With iROCKER!
False Creek offers an exciting urban paddling trip with easy access to the river and a range of rental options.
Among its serene, safe waterways and picturesque skyline, this spot provides an ideal environment for experiencing the excitement of being out on the water. It’s ideal for many False Creek paddle boarding activities, including solo kayaking and stand-up paddle boarding, tandem paddle boarding, or canoeing.
Get the Blue Adventures app from iROCKER to organize your trip on the water in False Creek. Make the most of your time in Vancouver with this complete guide, including activity guidelines, rental locations, and thorough maps.

Image Source: Wikimedia Commons
Ready to experience the stunning beauty of Tofino from a unique perspective? Paddle boarding Tofino offers an incredible way to explore the calm waters, diverse wildlife, and breathtaking scenery. Whether you're a complete novice or looking for a refresher, this beginner's guide will equip you with everything you need to know for a memorable paddle boarding adventure in Tofino. Let's dive in and discover the best spots, tips, and gear for your Tofino paddle boarding journey.
DISCLAIMER: Before traveling to a paddle location, ensure that the location still allows for paddle boarding and make yourself aware of any rules and regulations in place.
Tofino - Rich History and Diverse Cultural Background
Before exploring paddle boarding Tofino’s spot, let’s first learn about its rich history and diverse cultural background.
Culture
Tofino, known as the "Surfing Capital of Canada", is located within the traditional territory of the Tla-o-qui-aht First Nation.
The Tla-o-qui-aht people are a Nation among the Nuu-chah-nulth First Nations, who have inhabited the West Coast of Vancouver Island for millennia. Their community currently includes over 1,200 citizens who reside in the ancient village sites of Opitsaht, Esowista, Ty-Histanis, and Načiks (Tofino).

Image Source: Unsplash
The Tla-o-qui-aht Nation's relationship with nature is deeply rooted in their cultural practices and beliefs. They believe in upholding Natural Law through the practice of ʔiisaak, which means to observe, appreciate, and act accordingly with the natural world. This interconnectedness with nature is central to their way of life and guides their actions in preserving and protecting their traditional territory.
Beach
Tofino's beaches, from the renowned surf of Cox Bay to the low-tide wonders of Chesterman Beach, aren't just scenic escapes; they're living cultural centers. Here, the community gathers amidst wind-swept trees and vast sandy stretches, embracing the rhythm of nature. Sunrise strolls, birdwatching, and even storm-watching are cherished pastimes. The beaches, especially those within Pacific Rim National Park Reserve like iconic Long Beach, aren't just for recreation; they're gateways to the rainforest, cultural gatherings, and a deeper connection with the Hiłcaatu (Pacific Ocean) and the Tla-o-qui-aht First Nation's ancestral land.
Top 6 Tofino Paddle Boarding Spots
In Tofino, British Columbia, the stunning coastal waters are a wonderful place to explore with stand-up paddle boarding, or SUP for short. There are lots of wonderful spots to paddle in this breathtaking area, regardless of experience level. Below are the top 6 paddle boarding Tofino's locations.
Beginner Spots for Tofino Paddle Boarding
For those who are first getting to know about paddle boarding, you can refer to some beginner-friendly spots below for an easier experience when paddle boarding Tofino.
- #1 Tofino Harbour
If you've never paddle boarded before, we recommend starting at Tofino Harbour Authority. Simply paddle around the wharves that surround Tofino while remaining close to the coast. This is a great paddle boarding Tofino route that is suitable for beginners and leaves at Tofino Harbour Authority. It's a 2km paddle roundtrip to Bravacodos Restaurant and back.

Image Source: Flickr
- #2 Mackenzie Beach
Whalers gathered at Tin Wis, which means "calm waters" in Nuu-chah-nulth, to bring their catch onto the beach and out of the way of the breaking waves. Paddling in this protected paddle boarding Tofino harbor is a terrific way to take in the subtidal marine life that clings to the rocks.
- #3 Strawberry Island Loop
If you're in the mood for something a little riskier and daring, consider the Strawberry Island Loop for a paddle boarding Tofino location. This circle is suitable for beginners and includes a short 150-meter crossing to get to Strawberry Island from the mainland. Consider combining the Strawberry loop with a paddle to Bravacodos for lunch if you want to paddle for the entire afternoon.
- #4 Florencia Bay
Paddle boarders will find a haven at Florencia Bay, known locally as Flo. This serene beach, once named "Wreck Bay" after the ill-fated ship Florencia, offers calm waters perfect for exploring. While enjoying your paddle, keep an eye out for fellow water enthusiasts, as well as playful seals and sea lions, and maybe even a few fishermen casting their lines.
Intermediate Spots for Tofino Paddle Boarding
Let’s explore the next mid-level Tofino paddle boarding spots.
- #5 Riley Stone Loop
If you're an intermediate paddler looking to spend two to three hours on the water, this is a wonderful option for you. Given that it takes you farther offshore and away from populated areas, this route is considered intermediate. In addition, it features a 400-meter tidal-influenced water crossing. This means you should be a more proficient paddler and conversant with boat traffic regulations, as well as have a basic understanding of reading tidal maps and how currents flow between islands.
- #6 Browning Passage
Nestled within serene landscapes, Browning Passage has a 10 km loop designed for intermediate paddle boarding Tofino’s enthusiasts. The loop weaves through varying terrains that challenge one's skills yet offer a feast for the senses. The passage's waters range from placid, mirror-like surfaces that reflect the vast skies to more dynamic sections where currents and breezes test the paddler's prowess and agility. Along the course, paddlers are treated to a stunning display of nature's dichotomy—rugged terrain on one side, steep, and forest-clad cliffs dropping precipitously into the water on the other.

Image Source: Wikimedia Commons
Paddle Boarding Tofino: The Best Times
The best time for paddle boarding Tofino is during the summer months, particularly in the early morning or late afternoon when the waters are typically the calmest. Summertime also brings smaller waves, known as peelers, perfect for experimenting with paddle board surfing. Even if the waves seem too small for traditional surfing, the added momentum from your paddle can help propel you into these gentle breaks, offering a fun and unique experience.

Image Source: Unsplash
Tofino is truly lovely year-round, but the fall months offer some of the best surf and moderate temperatures. It can get crowded at the beach (and hence the surf) in the summer, so for the greatest experience, go between August and October and April and May.
3 Other Unique Activities at Tofino
Besides paddle boarding Tofino, water enthusiasts can enjoy a lot of other adventurous activities such as:
Storm Watching
Embrace the wild beauty of Tofino in the fall and winter months with the exhilarating activity of storm watching. Experience nature's symphony as powerful winds howl, waves crash against the rugged coastline, and rain dances upon the shore. Whether you're observing from a cozy vantage point or venturing onto the beach to feel the storm's raw energy, Tofino's winter storms offer a captivating and unforgettable experience.
Kayaking Clayoquot Sound
Kayaking in Clayoquot Sound is a memorable experience due to its rugged beauty, featuring breathtaking west coast mountain and ocean scenery. The area boasts stunning white sand beaches accessible via surf landings or island walks and is also home to one of the world's largest temperate rainforests.
Difficulty Level:
Clayoquot Sound offers kayaking opportunities for various skill levels. Beginners can opt for guided tours or explore calmer waters, while experienced paddlers can embark on more challenging routes through the sound.
Whale Watching
Clayoquot Sound is a prime destination for whale watching from February through October due to its abundant food sources. In spring, the herring spawn attracts Grey whales on their annual migration from Baja California, with some remaining in the sound to feed on invertebrates.

Image Source: Unsplash
Humpback whales also arrive from Hawai'i to join the feast, and occasionally, Transient Orcas (Killer whales) pass through while hunting. This convergence of whale species makes Clayoquot Sound a unique and dynamic location for observing these majestic creatures in their natural habitat.
Tips for The Best Paddle Boarding Tofino Experience
To have the best experience when paddle boarding Tofino, paddlers can make the most of some recommendations below.
Parking
Try to get to your preferred beach early if you're driving because parking does tend to fill up during busy times. Pay for your parking and, if required, your passes to the Pacific Rim National Park by following the signage.
Beach Facilities
Both at municipal beaches and in the National Park Reserve, the majority of beaches have restrooms available (with a few pit toilet facilities). Additionally, many beaches have water refill stations, change rooms, and showers for washing off wetsuits after playing in the waves.
Take Paddle Boarding Lessons
To better understand the physical risks associated with ocean swimming, such as riptides, currents, and the board itself, we recommend taking a surf or paddle boarding instruction to those who wish to spend time in the water.
Finding The Right Water Gears
Equipping yourself with the right gear is crucial for a safe and enjoyable paddle boarding experience in Tofino. A wetsuit is essential to stay warm in the cool waters, while a properly fitting life jacket ensures your safety. A paddle board leash keeps you connected to your SUP board, and sun protection essentials like sunscreen and a hat are a must under the strong Tofino sun. Additionally, consider comfortable footwear with good traction, such as water shoes or sandals, for exploring both on land and in the water.

Renting
Below are some rental places’ names and price ranges in Tofino paddle boarding that you may need:
- Surfboard, Bodyboard, Skimboard Rentals: From CA$20
- Paddle Board Rentals: From CA$30 2-24 Hours, Multi-Day Discounts
- Wetsuit Rentals: From CA$20
- Kayak Rentals: From CA$25 2 Hours - Day Rentals
- SUP Surf Rental: From CA$30 2-24 Hours, Multi-Day Discounts
Renting a paddle board can be convenient, but owning your one allows you to use and customize it according to your preferences. One of the good choices that many paddlers recommend is iROCKER’s paddle board.
Our inflatable SUP boards are well-known for durability, stability, and versatility. With features like non-slip deck pads, adjustable paddles, and sturdy construction, iROCKER paddle boards are designed to enhance your paddling experience on various water bodies, including rivers, lakes, and oceans. Shop our store now!
Paddle Boarding Tofino with iROCKER
With the ideal paddle board for your journey, paddle boarding Tofino’s breathtaking waves will cover all you need. A large selection of inflatable paddle boards from iROCKER are suitable for paddlers of all experience levels, from novices to experts. We always have a board that enables you to maximize your paddle boarding experience on Tofino’s water, no matter when you visit.
Also, let's download our Blue Adventure App if you want to organize your paddle boarding trip but are unsure where to begin! This app allows you to track your paddling voyage, find the best launch places, and get more information about Tofino’s hidden jewels.
FAQ
After getting a lot of useful information regarding paddle boarding Tofino, let’s answer some related questions around this hot spot.
What equipment do I need for paddle boarding in Tofino?
Before heading out on the water, ensure you have the right paddle board, paddle, personal flotation device, leash, rescue whistle, fins, and appropriate clothing and footwear for the conditions.
Do you need a wetsuit to swim in Tofino Beach?
The water near Tofino is normally cold (12–15 degrees), so wearing a wetsuit is advisable. If you decide against wearing a wetsuit, pack a towel and some extra clothes for the beach to stay warm. Wetsuits are provided for all classes and tours and are a great investment to keep you warm in the water.

Some may find it difficult to carry a kayak as it's quite heavy and awkward to handle. Proper technique can help you transport your kayak easily to and from water, protect its condition, and avoid hurting yourself.
There are various kayak types that require different carrying techniques. However, don’t get nervous, as we can help you out with several useful methods to get the job done.
Our article will also include instructions on how to tie down a kayak if you want to transport it on a car roof for a long distance. Prepare your laces and let’s get started right now!
How to Carry a Kayak?
Here are some simple ways to carry a kayak with ease!
Carry an Inflatable Kayak
An inflatable kayak usually boasts a sit-on-top design. It is lighter and easier to carry over your shoulder. The technique is similar to that of the hardshell sit-inside kayaks.
- Step 1: Fill up your kayak with the required PSI. The bow needs to point in the desired moving direction.
- Step 2: Stay in the center of the kayak and face it. If you want to place it on your right shoulder, ensure the bow is on your left. And vice versa.
- Step 3: Crouch down and reach across the inflatable kayak to the tube on the other side. Grab the tube beneath where it touches the ground, then gently tip the kayak over onto its side.
- Step 4: Keep your hands under the tube and stand up with the kayak with you. Always maintain a straight back!
- Step 5: Find a balance point to rest the inflatable tube on your shoulder by moving the kayak forward and back.
- Step 6: Reverse these steps if you want to lower the kayak.
Carry a Hardshell Sit-on-Top Kayak
Since sit-on-top kayaks do not have a cockpit rim, they are heavy to carry. Some can be carried without assistance, but longer distances require a kayak cart or carry strap. Most sit-on-tops are heavy, but lighter ones can be brought under the arm.
- Step 1: Lay your kayak down on the ground and point the bow in the direction you want to go. Stand at the balance point, with a little away from the middle. If right-handed, face the bow and stay to the left of the kayak. Vice versa if you're left-handed.
- Step 2: Place your feet shoulder-width apart and face the other way across the kayak. Maintaining a straight back while squatting, raise the kayak onto its side so that its top faces away from you.
- Step 3: As you turn to face the kayak's bow, maintain one hand on it for stability.
- Step 4: If you want to carry a kayak properly, maintain your back straight and stand up straight with your legs while sliding your hand down the kayak until you find the grab handle. This method can be difficult since you carry all the weight on your arm. If you're not sure you can do this or you have back pain, consider using a kayak cart or carrying straps.
- Step 5: Squat down until the kayak touches the ground in order to lower it.

Carry a Hardshell Sit-Inside Kayak
The most efficient method for carrying smaller kayaks is to lift and take them on your shoulder.
- Step 1: Place the kayak on the ground so the bow faces the desired direction.
- Step 2: Stand close to the cockpit and face the kayak to prepare for lifting. Position the bow to your right if you want to carry a kayak on your left shoulder and to your left if you're going to carry it on your right shoulder.
- Step 3: Squat down, grab the cockpit rim, and roll the kayak onto its edge. Remember that the cockpit needs to face away from you, and you should maintain a straight back.
- Step 4: Extend your legs straight to allow the kayak to slide up your legs. Then, gently bend your knees so the kayak will sit on your thighs. It's the basic technique to carry a kayak.
If you find it difficult to rest your kayak on your thighs, place it on a box, bench, or log.
- Step 5: To roll a kayak, extend both hands across the cockpit and grab the rim on the far side. Maintain a straight back, and do not twist your upper body as you roll the kayak in your direction and onto your shoulder. If your kayak is too heavy, try a different approach.
- Step 6: To make a kayak land precisely on your shoulder, balance it by placing your hand inside the cockpit on the upper rim. For additional comfort, you can wear a personal flotation device.
- Step 7: To return the kayak to the ground, repeat the process in reverse order.
How to Transport Your Kayak?
It can be challenging to carry a kayak to your desired destination. Let’s scroll down for some useful methods to get the job done!

Dragging
If you have a plastic kayak, you can drag it to the water. All you need to do is hold the handle at the bow and drag the kayak.
However, it's not recommended to drag composite or fiberglass kayaks since they can make holes and cause extensive damage. Dragging should be done only on sand or glass to protect the keel. You'd better use a keel guard or skid plate to pull your kayak safely.
Using Kayak Carts
If you wonder how to transport a kayak without a roof rack, kayak carts can be an option. They are two-wheeled attachments that slide onto the center or one end of a kayak. It lets you wheel your kayak along by grasping a handle at one end. The carts make carrying the goods from far distances to the water much easier. But the gear is not suitable for rough or rocky put-ins.
You can fold, assemble, and disassemble the kayak cart easily, and they can fit nicely into your kayak or hatches. They cost around $60 to $150.
Using a Roof Rack
Loading a kayak onto a car can be difficult, but you can do it with a sturdy rack system. If your vehicle has factory racks, you just need to buy some accessories suitable for your kayak.
If your car does not feature a rack system, a basic crossbar and tower are also required to hold the accessories. Purchasing towers may be advantageous depending on your desired roof rack system because basic towers are more robust and able to support a greater weight than factory racks.
The most popular roof rack systems to carry a kayak include:
- J-Style Racks: J-Style Racks or J-cradles create a J shape for side loading and supporting your kayak at an angle of 45 degrees.
- Saddles: Saddles are padded platforms that slide along your vehicle's crossbars. They are horizontally positioned and rest beneath the hull of your kayak during transit.
- Stackers: These upright racks are fantastic for families with more than one kayak. They allow you to carry more than one kayak at once since they hold your kayaks upright.
- Temporary pads: They are foam blocks designed for short, low-speed trips. Buckles that fit through the car doors make adding and removing the pads from vehicles simple. Rather than purchasing aftermarket roof racks, some people have made their own rack systems out of pool noodles and ropes, which work similarly to temporary pads.
Here are other necessary items used along with the rack system to transport kayaks.
- Crossbars: Most cars have bars installed by the factory that extends from the front to the rear of the roof. If your vehicle doesn't have them, they're not too difficult to install.
- Camp straps: Also known as ratchet straps, cam straps secure your kayak. Two straps, each about twelve feet long, are required. If you want to deter theft, you can even get them with locks.
- Bow and stern straps: Although they are optional, bow and stern lines will reassure you that your kayak won't blow off the roof. They tie the kayak's nose to the front and the kayak's tail to the back of your vehicle.
Using J Cradles and Stacker
Using J cradles and stackers will eliminate the need for towers. You can hold your kayak on its side with J-shaped cradles, freeing up roof space for additional storage. You need to lift the kayak above your head to position it in place to use the cradles. You can do it by bending your knees, grasping the cockpit's front and rear, and sliding the kayak onto your thighs. Next, raise one knee to stabilize the kayak, then lift it above your head and set it on the cradles. Tie it down after it's in the cradle.
Alternatively, additional kayaks may be put onto a single roof rack by using kayak stackers to lay kayaks on their sides against one another. Although they may also be used for touring and recreational kayaks, stackers are mostly helpful for whitewater kayaks.
Use an Inflatable Kayak
If you don't know how to transport a kayak with ease, go for an inflatable one. The kayak itself is convenient and easy to transport without needing a roof rack system. Thanks to its design, you can put it in your car's backseat or in a truck. Once deflated, it can fit into a small duffel bag or backpack for convenient carrying and quick access to the water's edge.
Use a Pick-Up Truck
If you don't have an elongated roof vehicle, kayak transport can be done by a pick-up truck. Tailgate pads are readily installed on the tailgate of these trucks. After positioning it, you can put the kayak down in the truck bed and fasten it firmly. This technique is comparable to temporary pads and is appropriate for short distances.
Fit A Kayak Trailer Into Your Car
A kayak trailer is a convenient solution for families with multiple kayaks, as it can be easily transported and accessed from the vehicle's tow bar. This alternative to roof rack systems allows for easy loading and unloading of kayaks, making them a more convenient option.
How to Load & Unload a Kayak?
Imagine you can carry a kayak to the beach. However, how to load and unload it? If you haven’t got the answer, we’ll show you how.
Loading a Kayak With Others
Loading a kayak onto a car with all installed accessories (crossbars, rack/padding, and straps/lines) is easiest with two people.

- Step 1: Each person stays at one end of the kayak, grabs handles, and places it parallel to your car, with the bow facing the front of the vehicle.
- Step 2: Raise the kayak by grasping the hull at each end (not the grab grips). Make sure you lift it using your legs rather than your back.
- Step 3: Ensure the kayak is above your head, then gently and exactly place it on the rack.
Loading a Kayak Alone
Some people are strong enough to lift the kayak themselves. However, if you can't carry a kayak alone, there are some tips for you:
- Use a lift system: Kayak racks with integrated lift systems that slide from the top to the side of the vehicle make the kayak loading easier. Once the rack system is loaded, it can be raised onto the top of the car. Even though they are pricey, these racks work well to lower the height for the loading process.
- Incorporate rolling wheels: Compared to the previous system, rolling wheels are a cost-effective solution. They allow you to easily position the kayak's bow and stern end and roll it forward into the front cradle.
- Use a blanket or towel: This low-cost, low-tech technique can be effective. Put a towel or blanket on the back of your car and place your kayak's bow on it to attach it to a rack. Push the kayak forward onto the rack after lifting the stern.
Loading Multiple Kayaks
Here are some tricks to bring multiple kayaks into your car.
- Install a second rack: Adding another rack helps you transport one more kayak. Check the kayaks' width and crossbar to ensure the method works.
- Get the stacker bars: Stacker bars are a helpful accessory for stacking many kayaks. You can arrange them to lie on their side, thus reducing space consumption. They can be utilized with lighter, shorter whitewater kayaks as well as touring and recreational kayaks.
Tying Down Your Kayak
Here is a simple guideline on how to tie a kayak to roof racks. Before starting, ensure you have enough kayak tie down straps.
- Step 1: Hold the cam strap buckle close to the front beams of your roof rack system and toss the other end to the other side to secure your kayak to it.
- Step 2: Pass the section back over the kayak to where you started by looping it under the crossbar.
- Step 3: Twisting the cam strap is an important step in the kayak tie-down process. It will prevent the strap from flapping in the wind.
- Step 4: Tighten the buckle after inserting the tail end. Repeat with the other strap at the back end.
- Step 5: Tuck the remaining straps into the car doors to secure it.
Below are some extra tips to make your kayak tie-downs easier:
- Use the bow and stern straps: This equipment provides additional security to guarantee that your kayak doesn't go off while transporting.
- Use a ladder: A step ladder nearby can greatly simplify the task.
- Twist the straps: Twisting can prevent the strap from flying when you drive.
- Buy locking straps: Locking straps function similarly to regular straps. The only difference is the buckle mechanism. While some require a numerical code to be unlocked, others include a key.
- Double-check: After securing the straps, you need to check them again before starting to move. It's also recommended that you check again after 15 minutes of driving.
Keep Your Kayak From Scratching!
Depending on your kayak type and whether you do it alone or with somebody's help, there are different ways to carry a kayak. The main technique is to lift it with your legs (not your back) and use proper grips or handles.

Transporting kayaks by car can be a struggle. However, the equipment will be secured perfectly with our detailed instructions above on how to tie a kayak to a roof rack.
For easy outings, you should choose an inflatable kayak. A little challenge to bring the water equipment can’t stop a true water lover from exploring the aquatic world. And iROCKER is your best companion during your journey.
If you need any gear to support your adventure, don’t hesitate to contact us for the best price! Explore the water with our kayaks and aquatic equipment. Visit iROCKER for various options at great prices.
FAQs
There are accessories to help users carry a kayak with ease. However, there are questions kayakers may wonder before starting. Let's take a look at some of them!
1. Should I Drag My Kayak?
No. Although you may occasionally need to drag your kayak, it is not advised because it could cause irreversible damage. On the other hand, some kayaks feature changeable skid plates that make dragging simple and don't result in major damage.
2. Can You Carry a Kayak on a Small Car?
Yes, you can do it by choosing a roof rack suitable for your car and kayak type. Check out some options, such as saddles, J-cradles, and custom padding.
3. Can I Put a Kayak on My Car Without a Rack?
Yes, it's possible to put a kayak on your vehicle without roof racks or cross bars by using the ratchet straps to secure the kayak to the car roof. You can also place blankets or yoga mats on the roof to prevent scratches.
4. Can You Ratchet Strap a Kayak to a Car?
Yes. Fasten the line to a safe point on the front of the kayak, such as the grab handle, then fasten the other end to a safe spot on your car. Use a hood loop strap if you don't have a tow hook. Avoid attaching tie-down straps to your car's plastic components.

Are inflatable kayaks any good? Yes, they provide many benefits for users. Many sports lovers, especially beginners, choose this type of kayak since it's portable, durable, stable, and versatile.
The equipment has many advantages overwhelming other water gear. Let’s consider its detailed pros and cons before making an informed purchase!
What Are the Benefits of Inflatable Kayaks?
Are inflatable kayaks any good? There are reasons why the answer is yes. Here are the advantages that make them overwhelm others:
- Lightweight nature
Due to their heavy weight, hard shell kayaks are difficult to carry, particularly when loading or unloading from car roof racks. It especially poses challenges for older people. Meanwhile, inflatable kayaks offer lighter weight and ease of carrying. They usually weigh between 30 and 40 pounds, making it a suitable choice to save your physical strength for water activities.
- Weight capacity
Compared to hardshell kayaks, inflatable kayaks can support much heavier loads—up to 400 pounds on average and up to 1000 pounds on more expensive versions.
- Compact size
Inflatable kayaks are popular due to their compact size. Users can easily fold them into a backpack or store them in a limited space. They are also suitable for small cars and do not require any roof racks or crossbars.
- Durability
It's a common misconception that inflatable kayaks are easily damaged or punctured because of their air-filled construction. But thanks to modern technology and strong rubber and PVC materials, they are sturdy and resilient enough to survive such challenges.
- Stability
Unlike pool floats that split in half under heavy weight, inflatable kayaks are not the same. They can be strong, rigid, and stable if the air inside them is sufficiently full (measured in pounds per square inch, or PSI).

Plus, they usually feature wider beams, which make it hard for them to capsize and offer necessary stability in water.
- Versatility
Thanks to its compact size, you can bring your inflatable kayaks anywhere and access some spots where a hardshell is impossible.
- Ideal choice for novices
Are inflatable kayaks any good? Yes, they have many advantages that a beginner can benefit from. Since inflatable kayaks are inherently buoyant, stable, and portable, it's easier for newbies to learn kayaks.
- Affordability
Inflatable kayaks are cost-effective compared to traditional hardshell kayaks, making them an excellent choice for budget-conscious individuals or beginners uncertain about investing heavily in the sport.
What Are the Disadvantages of Inflatable Kayaks?
Everything has its pros and cons, and so does the inflatable kayak. Some users may find issues with it, including:
- Controlling issue
Heavy hard shell kayaks offer better control under wind, strong currents, and choppy water conditions. But thanks to the improvement in inflatable technology, "higher-end" inflatables aren't far behind.
- Limited onboard storage
Inflatable kayaks have mesh pockets, tie-down spots, and bungee cords. However, there is no space for a dry storage hatch.
- Extra preparation
Unlike heavy hardshell kayaks, inflatable ones require one more preparation step: inflating. The process takes only a couple of minutes, but it also prevents you from jumping in the spot immediately. Plus, you must bring a pump with you to inflate your kayak before using it.
- After-use required caring
You can't just strap your inflatable kayak on the car's roof and head home. You need to let it dry before deflating to avoid unwanted smells when you use it next time.
Are Inflatable Kayaks a Good Investment?
Considering all the pros and cons, purchasing an inflatable kayak is a good investment. It provides the necessary performance and other side benefits, making the 10 minutes of inflating the kayak worth it.
The market has various options, ranging from $60 to $2000. If you haven't decided what to get, take a look at iROKCER's inflatable kayaks. We offer high-quality products for portability, convenience, and performance.
Inflatable Kayaks Vs. Hardshell Kayaks
Inflatable kayaks are a popular choice for those looking to get on the water. They are affordable, easier to transport, and store. Though they might not be seen as status symbols like costly boats, they are great vessels for discovering the waves.

Are inflatable kayaks any good? Since they are wider, inflatable kayaks are usually more stable than hardshell kayaks. However, they are slower and may not move as straight as hardshell kayaks.
Inflatable kayakers should paddle more carefully to avoid punctures. While inflatable kayaks are a good choice for flat-water adventure, hardshell kayaks are better for whitewater.
Inflatable Kayak Vs. Inflatable SUP
Inflatable stand up paddle boards are typically slower and more difficult to maneuver than kayaks. Since SUPs are easy to capsize, using them as a splashing and workout tool is preferable during warm weather. In colder weather, inflatable kayaks will keep you fairly dry.

Stand-up paddle boarding requires more core strength, while kayaking can bring you to the same destination with less effort. However, many people still prefer SUPs owing to their aesthetic appeal, health benefits, and trendy look.
One more difference is the price tag. Paddle boards often cost more than kayaks.
So to find out what equipment is suitable for you, you need to consider several factors such as your preferences, purposes of use, practicality, and budget.
⇒ Maybe you’ll be interested in: Paddle Board Vs Kayak: Which is Best?
Inflating and Deflating Your Kayak
Users need more preparation for inflatable kayaks than hard shell kayaks, mainly for the inflating and deflating process. A pump is required to provide the desired PSI. Filling up the air will take around 10 minutes.
Also, ensure the kayak is dry and clean before deflating and storing it. Otherwise, it will be wet and have an unpleasant smell next time.
Final Words on Are Inflatable Kayaks Any Good?
Are inflatable kayaks any good? Yes, they are. They're suitable for those looking for durability, mobility, and ease of use. Their compact size makes them ideal for long-distance travel and limited space storage. Though inflatable kayaks are not as tough as premium hardshell kayaks, they're still a good option because of their cost and versatility.
If you're considering which water equipment to use, visit iROCKER to choose an option and have a wonderful experience.
FAQs
An inflatable kayak has many benefits. If you’re still wondering about its usage and storage method, here are some FAQs with answers to clear your doubt.
How Safe Are Inflatable Kayaks?
Inflatable kayaks are safe when used correctly and in suitable water conditions. They include several air chambers for flotation, making them strong and reliable. But it's important to pay attention to the weather and shield the kayaks from sharp items like oysters since they can be punctured.
How to Store Inflatable Kayak?
After deflating your kayak, fold the sides first and then roll it up so you'll not create any fold line. Unroll it at home, rinse it in clean water, and let it air dry before rolling it up again.
How Easily Do Inflatable Kayaks Get Punctured?
They can be punctured, but you can use it safely for a long time with proper use and care. Modern inflatable kayaks can last 7 to 10 years with adequate care. Yet, your kayak won't survive longer than two years if you don't give proper maintenance.
Is Fishing from an Inflatable Kayak Possible?
Inflatable kayaks are a convenient and portable option for fishing, especially for those seeking remote locations. They are comfortable and simple to set up for a day on the water, with features like adjustable seats, rod holders, and plenty of gear storage.

Inflatable kayaks are a great option for any river since they offer a stable platform for landing large fish. These kayaks are a great option for people who want to enjoy the sport on the water since they are frequently more portable and sturdy than standard hardshell kayaks.
Are Inflatable Kayaks Stable and Easy to Paddle?
Yes, they are stable, thanks to their large and flat hulls. They're also easy to use and suitable for beginners.
Are Inflatable Kayaks Suitable for Ocean Use?
Inflatable kayaks are ideal for exploring ocean beaches and estuaries due to their lightweight, portable, and easy maneuverability. However, to ensure durability and safety, you need to select a kayak specifically made for this purpose. Research the conditions where you plan to kayak to choose a suitable one and take safety measures while exploring.

Paddling a kayak brings you exhilarating experiences that no other sport can. It can be a calm day on a still lake or a thrilling expedition on a quick-moving river. Every paddling trip reminds you of why you’re into this sport. And it can’t lack the most crucial companion—your kayak.
You can see that abundant kayak designs and types exist in the market now. This makes a beginner’s kayak selection, like yours, even more daunting. The good news is that it shouldn’t be a struggle. Following is a comprehensive guide covering the most crucial factors to consider when buying a kayak for your requirements.
This ultimate guide can help you touch the fundamental key points when buying a kayak:
- Location you want to paddle: in a lake, a river, or a seacoast
- Kayak designs: traditional sit-inside kayak or a sit-on-top one
- Kinds of kayak that suit your paddling purposes
- Major factors to consider before choosing a kayak
- Useful tips for easier launching
Where Are You Mostly Going to Be Paddling?
Buying a kayak requires careful consideration of the water conditions you plan to explore. Certain kayak designs are made especially for specific situations.
1. Lakes
Lakes offer tranquility, with a very small impact of wind and boat traffic near the shore. This environment is perfect for a relaxing day on recreational kayaks and day-touring kayaks.
2. Coasts
Unlike lakes, when paddling along seacoasts, you’ll get more contact with wind, waves, currents, and tides. For this purpose, when buying a kayak, keep your eyes on longer sit-inside kayaks or sit-on-top kayaks—they are suitable for calm coastal waters. However, if you’d like to paddle in open waters, such as navigating waters or waves, day touring kayaks with skegs or rudders are good ideas.
3. Rivers
A day-tour sit-inside one can also be a great choice if you’d like to float stably and sturdily on a slow-moving river. When buying a kayak, consider a short and stable recreational sit-in or sit-on-top kayak.

4. Rivers and Lakes
Don’t skip this versatile option of longer recreational or day-touring kayaks if you plan to paddle both calm and moving waters. Several kayaks are designed with longer lengths for both still and slow-moving creeks and rivers. You can choose a sit-on-top or a sit-in kayak with a skeg or rudder for a higher maneuverability degree.
General Kayak Designs
Some kayaks are made to be sat on, while you can sit inside the others. This fundamental difference has a huge impact on your paddling experience.
The distinction between sit-on-top kayaks and sit-inside kayaks is a fundamental notation that can remarkably impact how your paddling experience will be.
Sit-on-Top Kayaks
Sit-on-top kayaks have an open cockpit structure, allowing you to sit on top of the hull. Therefore, this is primary for beginners like you who are afraid of getting stuck in the kayak flips. As a result, buying a kayak like a sit-on-top one is a realistic choice for leisure water activities like recreational paddling and fishing on ponds, lakes, or slow rivers.

Advantages:
- The open design makes it easy to get in and get out. You won’t feel trapped if it capsizes—you just need to climb back on.
- They’re stable in calm waters because of their wide width.
- These kayaks are extremely adaptable, too—you can use them to paddle in different water environments like lakes, rivers, and even the ocean.
- You can easily keep water out and let it drain naturally by self-bailing with bilges.
Disadvantages:
- The open cockpit will expose you to the sun, wind, and various water conditions. This can be uncomfortable in colder weather or rough conditions.
- The width and high gravity center of sit-on-top kayaks make them less stable in waves or rough seas.
- They’re slower, thus requiring more effort to paddle.
- They’re less efficient for long journeys.
- It might be tricky to control and turn without the support of pressure on the footpegs. Navigating through tight spaces can be challenging for you.
- Sit-on-top kayaks offer less dry storage space compared to sit-inside models.
- Their significant weight also complicates the process of transportation and launching.
Sit-Inside Kayaks
Sit-inside kayaks are versatile vessels for various water environments, including lakes, rivers, and coastal waters. These kayaks are characterized by their enclosed cockpits covered by a spray skirt or a removable hatch.

Advantages:
- The cockpit design enhances protection from wind, waves, spray, and cold water.
- Sit-inside kayaks are renowned for providing enhanced stability and balance owing to their lower seating position. It means you’ll move faster and need less energy to propel. And it’s more efficient for long paddling trips.
- In rough water, sit-inside kayaks are easier to control and navigate due to the multiple points of contact inside them.
- There’s plenty of dry storage space for extra gear and supplies on longer or overnight trips.
- Sit-inside kayaks are easier to transport as they’re lighter than the sit-on-top models.
Disadvantages:
- Getting into and out of the cockpit can be quite complicated.
- Water can accumulate inside if it enters the kayak.
- They don’t have self-draining scupper holes. When water enters, you need to manually empty the kayak by using a bilge pump or bailing techniques.
- They require more skills to remain upright because of their more narrow beams.
All in all, it's important to assess the strengths and weaknesses of each design and compare them to your intended use, the environmental conditions, and your comfort level. This will help you in buying a kayak that best suits your needs.
Types of Kayaks
Kayaks nowadays have become various types, each designed for specific activities and water conditions. Here are the most well-known kayak types.
1. Recreational Kayaks
Recreational kayaks are awesome to paddle around on lakes, slow-moving rivers, and seacoasts. They have sit-on-top designs with open cockpits for easy entry and exit. Plus, they’re pretty affordable. That’s why they’re a popular choice for most beginners when buying a kayak.

The short length and wide body mean they’re really stable and easy to steer. They often measure between 10 and 14 feet in length, with beams being 28 to 32 inches wide. The only downside is recreational kayaks are a bit slow, so you'll need to put in more effort to make them move on water.
2. Day Touring Kayak
If you care about speed when buying a kayak, day touring alternatives are ideal options. Unlike recreational alternatives, day touring kayaks feature sit-inside designs, smaller cockpits, sleeker bodies, and longer frames—perfect for adventurous paddlers. Specifically, they’re 14 to 16 feet long and usually feature beams that are 22 to 25 inches wide.

Despite requiring more skill to handle, they provide you with a higher control degree when paddling in windy conditions. Additionally, they're easy to transport and have ample dry storage space.
3. Expedition Kayaks
The sit-inside expedition kayaks are specifically designed to be longer (17-20 feet long) and to accommodate larger loads with their generous storage areas. Additionally, they’re equipped with a retractable skeg or rudder—this device maintains stability and maneuverability.

When buying a kayak, expedition kayaks are practical for those seeking adventurous and fast-paced paddling journeys.
4. Specialty Kayaks
Apart from common types of kayaks, there are also some specially designed to solve your headache of buying a kayak, like tight space problems or to fit a whole family going paddling or even extreme paddling activities. Those are tandem kayaks, fishing kayaks, pedal kayaks, whitewater kayaks, folding and inflatable kayaks.
5. Tandem Kayaks
Like its name, tandem kayaks have an extra large cockpit or two distinctive cockpits and accommodate two paddlers. Tandem kayaks are ideal for families or a group of friends when buying a kayak to paddle together.

Because there are two paddlers to propel them, you don't have to spend much energy while the kayaks move fast forward. They're suitable for quiet ponds, small lakes, or still rivers. So, if you plan for a kayaking day with your partner or family, tandem models are perfect for you when buying a kayak.
6. Fishing Kayaks
These kayaks are usually sit-on-top designs that bring you pleasant feelings when fishing. They're also equipped with rod holders, paddle holders, electronics consoles, and tank wells for gear storage. And don't worry about your catches, as these kayaks can carry more weight than the above types. This helps you haul gear.

It's one kind of recreational kayak, so no matter whether you use a fishing kayak on small to large lakes or calm rivers, it will satisfy your fishing pleasure.
7. Pedal Kayaks
Yes, it's a combination of a kayak and a "pedal". If you're on a paddling trip and would like to take some photos or use binoculars to watch birds but want to keep track, then aim for a pedal kayak when buying a kayak.
They are steered by a rudder controlled from the cockpit and propelled by fins operated by bike-like pedals. Pedal kayaks require less effort to propel; however, they are heavier and more expensive than average sit-on-top kayaks.
It explains why most paddlers choose to haul them on a trailer for easier transportation. Moreover, you have to switch to using paddles when paddling in shallow water so that it won't damage the fins.
8. Folding Kayaks
Folding kayaks are easy to assemble and disassemble, offering you a great solution for your worries about lack of storage space.
Although they are usually slower, pretty expensive compared to other kayaks, and require more effort to propel, folding kayaks still stand out for their unique features.

10' Tucktec Foldable Kayak by iRocker
Their collapsible aluminum frame and foldable waterproof skin allow you to fold them inside two separate bags to transport. Plus, it doesn’t take you long to unfold a kayak. To demonstrate this interesting feature, iROCKER's Tucktec Foldable Kayak only takes you 15 minutes for the first assembling attempt and just under 2 minutes after you become familiar with it.
Besides, iROCKER's folding kayak's flexible frames and sturdy plastic function like a hard shell that is resistant to tearing or punctures suitable when padding in lakes, ponds, bays, and inlets. You may rest easy knowing that the kayak won't leak since every fold is a Z pattern that folds in on itself, and there are no exposed seams beneath the upper level.
9. Whitewater Kayaks
This aggressive type of kayak is built to withstand big rapids, drops, and hard bumps with high-durable materials. Designed with a shorter length, they’re greatly maneuverable for quick response to obstacles and hazards.
The sit-inside design allows you to have more control and shift the kayak with your body weight. And the kayak will become a part of your body. This will bring you adrenaline-high experiences when paddling over tight spaces and obstacles.
However, if you’re a beginner, buying a kayak like a whitewater one might not be ideal for your first purchase.
10. Inflatable Kayaks
Another excellent solution worth considering when buying a kayak for space shortage is inflatable kayaks. It’s easy to assemble and disassemble them just by rolling them up and fitting them into a bag. You’ll transport them to any lakes, rivers, or seacoasts with no sweat.

Photo by iROCKER
Nowadays, there is a diverse selection of inflatable kayaks to suit your needs. They’re famous for being sturdy, durable, and able to withstand various water conditions since they’re made from strong and long-lasting plastic.
Whether you’re buying a kayak for recreational paddling or an exciting expedition, you can buy an inflatable kayak perfectly tailored to your chosen activities.
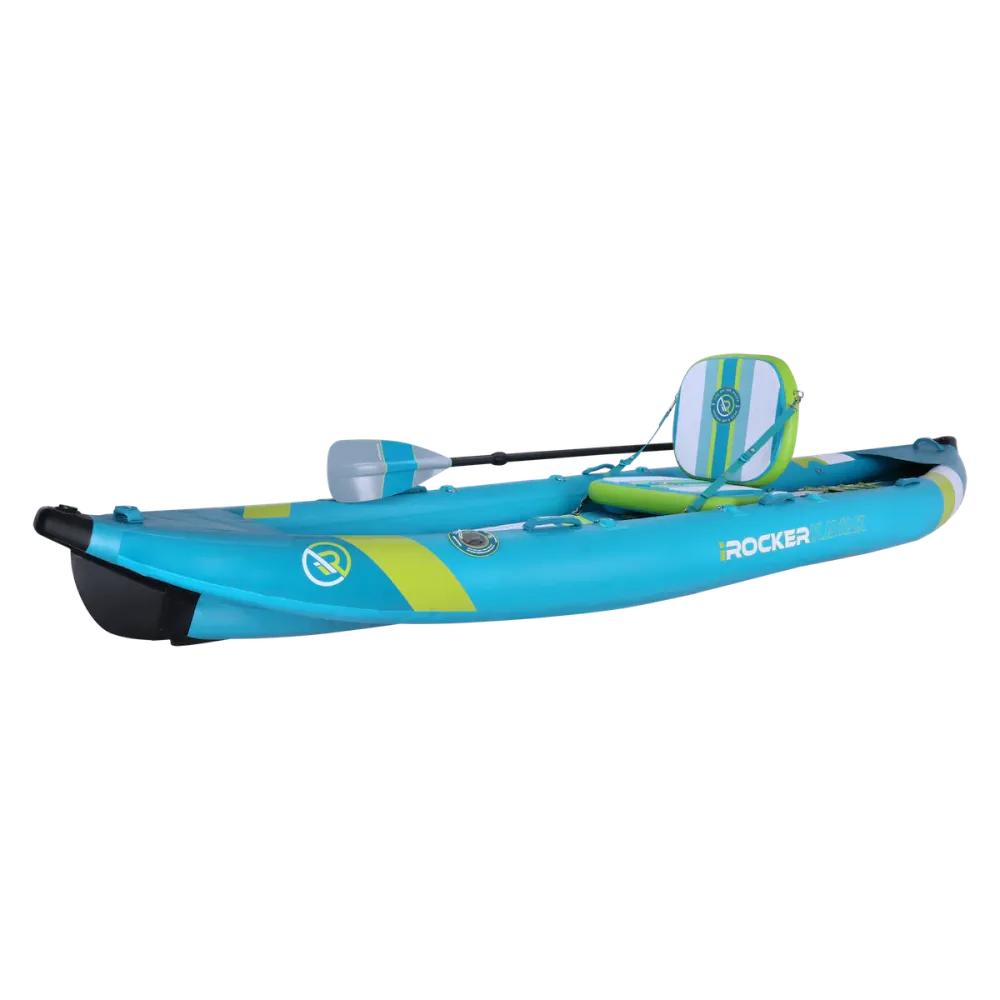
For your outdoor activities, the inflatable Kayak from iROCKER is a robust and versatile option. It’s designed with a pleasant sitting paddling experience and is stable but simple to use. With 26 D-rings and several mounting locations, the kayak’s modular design lets you personalize it with a range of extras, including coolers, speakers, and fishing gear. If you want to have a company, you can add a second seat to turn it into a tandem kayak.
Its lightweight and small size makes it incredibly portable. You just need to deflate it when not in use and store it in the wheeled bag. Now, prepare to go on an amazing adventure!
Factors to Consider When Choosing a Kayak
You should carefully take into account these essential elements when buying a kayak to ensure your kayak model best fits your paddling preferences.
- Length
Longer kayaks offer higher speed and stability for longer-distance paddling. When using a longer kayak, mastering the edging technique is a must-have as tilting the kayak onto its side increases maneuverability.
On the other hand, shorter kayaks provide greater versatility and are exceptionally well-suited for recreational use in calmer waters.
- Width
Remember, the narrower the kayak is, the faster it moves. Thus, narrower kayaks are better for rougher waters, while wider kayaks are good choices for calmer and stiller rivers.
Keep in mind that your kayak shouldn’t be too tight. You need enough space to move and exit in case of a capsize. The appropriate kayak width depends on your skill level and the types of water conditions you plan to paddle in.
- Seats
You should look for adjustable and comfortable seats that provide good back support so that you can stay relaxed even on long paddling journeys.
- Cockpit Size
If you want more control and connection to the kayak, aim for smaller cockpits. But pay attention, they can be harder to enter and exit. In contrast, larger cockpits are easier to access, but you’re more exposed to the sun, wind, splashes, and other natural elements.

When buying a kayak, we recommend you ensure the cockpit fits your height and body size. You should also consider your intended use when choosing the right cockpit size.
- Skegs and Rudders
Skegs and rudders are devices that can enhance directional stability and maneuverability when you go paddling.
There are two types of skegs: fixed and retractable. They’re fins installed on the underside of the hull. Fixed skegs are featured on recreational and inflatable kayaks, while retractable skegs are usually more suitable for day touring and expedition kayaks.
A rudder is also a fin below the water line and helps you maintain the course. Whereas skegs can’t rotate, rudders can rotate from side to side to street the kayak.
- Load Capacity
Ideally, you should choose a kayak that can safely support your weight and all your gear and belongings, including food and water.
- Materials
Kayaks are by and large made from three primary materials: composites, ABS plastic, and polyethylene plastic. Composite materials, including fiberglass or carbon fiber offer lightweight and high-speed performance, but they come at a premium cost. ABS plastic kayaks provide solidness and durability against ultraviolet light exposure and have a longer lifespan compared to polyethylene plastic kayaks.

The foremost budget-friendly choice is polyethylene plastic kayak models. The problem is that they’re the heaviest among the three, hence requiring more effort to paddle and transport. Having said that, for recreational paddling trips, polyethylene kayaks can be a viable choice.
- Weight
When buying a kayak, it’s important to factor in the calculation of the vessel weight. It will significantly influence how you transport and store your kayak. Lighter kayaks are much easier to transport and store. On the other hand, you may need assistance when stacking and unloading heavier kayaks.
- Gear Storage
When arranging a longer or overnight trip, one of the primary considerations should be sufficient storage capacity to accommodate the fundamental gear and supplies.
Kayaks constructed with bulkheads, hatches, and bungee rigging are a down-to-earth solution for storing, securing, and organizing your gear. This kind of equipment keeps your assets dry and accessible.
- Price
Kayak costs may vary strikingly, from budget-friendly alternatives to high-end sporty models. It’s significant to build a reasonable budget based on your monetary condition and intended usage. Making a thorough evaluation of kayak types, materials, sizes, and features will smoothen the process of buying a kayak for your experiences on the water.
Tips for Making Launch Easier
Taking advantage of launch sites and using the right techniques can unravel the process of getting on the water. Following are six tips to elevate your launching experiences:
- Choose a suitable launch site (drive-through launches, ADA launches, or one-way launches) with easy access to water.
- Have your gear ready before you arrive at the launch site.
- Use a cart to transport your kayak to the water's edge. Remember to position it properly.
- Opt for a kayak with a carrying handle or attachment points for trouble-free lifting and unloading.
- Ask a friend to assist you with carrying and launching your kayak.
- Practice proper launching techniques and be mindful of others. This is to give everyone a great experience and avoid creating unnecessary disturbances.

=> Maybe you'll be interested in: Canoe vs Kayak: What is the Difference?
Buying a Kayak Making Your Experiences Unforgettable!
As a beginner, it can take you more time to make a decision when buying a kayak. But don’t rush. Instead, take your time to assess the key points above (the location where you want to paddle, your intended use, kayak styles, and other crucial factors), you can narrow down your options and find a kayak that’s meant for you.
After this guide, you’ll be able to make a sound decision, find your way to get the perfect kayak, and make the most of your time on the water.
If you still need help with your decision, consult iROCKER’s kayaks to ease your decision process.
FAQs
Now let's move on to some common questions beginners have about buying a kayak, transporting it, how long it usually lasts, and converting from tandem to solo kayaking.
1. What size of kayak should beginners buy?
A wider alternative is the perfect choice for beginners when buying a kayak. It provides more stability and is less demanding to control and balance.
When it comes to leisure paddling activities, we suggest kayaks around 10 feet long and 26-32 inches wide. On the other hand, if you intend to go day touring paddling, a sleeker kayak that is 13-14 feet long and 24-26 inches wide is recommended for achieving higher speeds.
2. What is the lifespan of a kayak?
A kayak’s ordinary lifespan potentially endures for 6–12 years. Yet, it’s also subject to how you use and maintain your kayak and how much it gets exposed to sunlight, wind, and different water conditions. If your kayak is well reserved, it can last much longer.
3. How will you transport and store the kayak?
When transporting a kayak, you can use common straps like cinch straps. They’re a great solution and are easy to use. Another option is ratcheting straps, but it can damage your kayak when pulled too tight. Kanulocks are also a good option if you’re traveling.
To effectively store multiple kayaks, we recommend building a wooden rack to hold or store them. But if your space is limited, vertically attach the sterns to the ceiling and place them flat on the bow.
4. Can 1 person go in a 2-person kayak?
The answer is yes. Many tandem kayaks offer the option to remove the second seat if you don’t need it. However, paddling in a tandem kayak alone might be a bit harder. And it’s also less efficient compared to paddling with 2-3 people. Another better solution for you is using iROCKER’s inflatable kayak. The kayak is designed for you to enjoy your lonesome adventure or easily share it with a friend by adding a second seat.
![Paddle Board Calgary: Best 10 Spots [Beginners to Pros]](https://cdn.shopify.com/s/files/1/0623/7510/0601/articles/where-to-paddleboard-in-calgary-irockerca-1_44a34452-c2b5-4c6b-b95a-67826e2e6757.jpg?v=1737703217&width=100&height=100&crop=center)
Calgary's dynamic waterways offer tranquil lakes and roaring rivers to fuel any spirited outdoor enthusiast’s wanderlust. This city teems with paddle boarding spots that cater to novices, seasoned pros, and everyone in between. In this ultimate guide, let’s find where to paddleboard in Calgary and prepare for a thrilling adventure.
DISCLAIMER: Before traveling to a paddle location, ensure that the location still allows for paddle boarding and make yourself aware of any rules and regulations in place.
Paddleboard in Calgary: Beginner-Friendly Locations
For those new to the world of paddle boarding, or simply seeking a relaxing day on the water, these serene locations offer calm waters and welcoming environments.
1. Lake Bonavista
Nestled in the vibrant southeast quarter of Calgary, Canada, the enchanting man-made Lake Bonavista beckons beginner paddleboarders with its serene waters. The lake's consistently calm and glassy surface, coupled with gentle breezes and minimal waves, creates a perfect haven for honing essential paddleboarding techniques, such as mastering balance and finesse in maneuvering.
- Water Type and Skill Level: Calm, a man-made lake with minimal waves, ideal for beginners.
- Launch Points: Easy access around the lake.
- Unique Feature: Consistently glassy surface, perfect for practicing balance and paddle techniques.
2. Carburn Park
Nestled along the Bow River's banks, Carburn Park presents a picturesque haven for paddle boarders yearning for tranquility infused with a bit of adventure. The park's sheltered lagoon is the perfect warm-up spot before braving the river's more demanding currents. Abundant in wildlife and graced with towering trees, Carburn Park beckons nature enthusiasts to uncover its enchanting secrets.

Source: Flickr
- Water Type and Skill Level: Sheltered lagoon, suitable for beginners.
- Launch Points: The second pond in Carburn Park (larger pond and furthest from the parking lot)
- Unique Feature: Abundant wildlife and a rope swing for fun breaks.
3. Bowness Park Lagoon
Located within the beautiful Bowness Park, with an average depth of just about 1.5 meters, this lagoon offers calm waters perfect for beginner paddle-boarders. Surrounded by trees, it's sheltered from strong winds, making your paddle boarding experience smooth. Plus, with park amenities nearby, you've got everything you need for a fun day out!

Source: Wikimedia Commons
- Water Type and Skill Level: Calm waters, perfect for beginners.
- Launch Points: Ferry Nab and Cockshot Point
- Unique Feature: a picturesque setting surrounded by trees, offering protection from wind.
4. Sikome Lake
Nestled within the 13.48 square kilometer expanse of Fish Creek Provincial Park, Sikome Lake is a man-made aquatic facility known for its sandy beaches and clear waters. With a designated swimming area that spans over 10,000 square meters and a maximum depth of about 2 meters, it's an inviting spot for beginner paddle boarders. While the lake's infrastructure ensures gentle waters, its popularity, especially during weekends in July and August, means potential crowds. Therefore, early morning or weekday visits might offer a quieter paddle boarding experience.
- Water Type and Skill Level: Clearwater, beginner-friendly.
- Launch Points: Multiple access points around the lake.
- Unique Feature: There’s a designated swimming area that is popular for summer activities.
Paddleboard in Calgary: Intermediate Locations
For more experienced paddle boarders craving exhilarating challenges and boundless exploration, these intermediate locations promise unforgettable experiences.
1. Bow River
The Bow River, coursing through Calgary's vibrant heart, offers an invigorating paddle boarding experience for spirited intermediates. Gliding along its winding waters, you'll marvel at the breathtaking city skyline and lush riverbanks. With multiple access points peppered along the river, tailor your adventure to your heart's content. Be ready to conquer occasional currents and embrace the dynamic pulse of urban life as you paddle.

Source: Flickr
- Water Type and Skill Level: Flowing river, suitable for intermediates.
- Launch Points: Multiple access points along the riverbanks.
- Unique Feature: Home to many different plants and animals, it is also popular with fishing, swimming, and boating.
2. Spray Lakes Reservoir
Also located in Kananaskis Country, Spray Lakes Reservoir is a larger body of water that can be a bit windy, but it still has some calm areas that are suitable for Intermediates. It's important to check the weather conditions before paddle boarding on Spray Lakes Reservoir.

Source: Wikimedia Commons
- Water Type and Skill Level: Strong waves and winds; some calm sections with pristine clear water, suitable for intermediates.
- Launch Points: Whiteman's Pond and Spray Lakes West Campground.
- Unique Feature: Great views of Ha-Ling Peak, paralleled hiking trails with the western shore, picnic sites, and campgrounds.
3. Elbow River
Stretching approximately 120 kilometers from the Rocky Mountains to its confluence with the Bow River, the Elbow River offers a gentler paddle boarding experience. It's smoother than the Bow River and, with a width ranging between 20-50 meters in most parts, offers a scenic route replete with Calgary's natural beauty. Brush up on navigating its unique currents, and you're set for a memorable journey!
- Water Type and Skill Level: Gentle river with a few rapids, ideal for intermediates.
- Launch Points: Multiple points to launch on the river, including Elbow Falls boat launch and Fort Calgary.
- Unique Feature: A wide variety of terrain, including aspen parkland, undulating boreal foothills, and high alpine and sub-alpine mountains.
Paddleboard in Calgary: Advanced Locations
For seasoned paddle boarders craving adrenaline-pumping challenges and thrilling escapades, these advanced locations deliver an experience like no other.
1. Ghost Lake Reservoir
Just a short drive from Calgary, Ghost Lake paddle boarding offers a thrilling paddle boarding experience amidst the striking backdrop of the Rocky Mountains. Ghost Lake is usually not overly crowded, allowing you to enjoy a peaceful paddle boarding experience. With its vast expanse and frequently changing conditions, this location is best suited for experienced paddlers seeking a thrilling adventure.

Source: Wikimedia Commons
- Water Type and Skill Level: Large reservoir with steady strong winds, rocky shore, and deep water, best for advanced paddlers.
- Launch Points: Easy access from the South Launch.
- Unique Feature: Stunning Rocky Mountain views and variable conditions, year-round recreation such as sailing, windsurfing, swimming, and fishing.
Paddle boarding at Ghost Lake offers a unique chance to connect with nature, get some exercise, and unwind from the daily grind. Embrace the refreshing mountain air as you navigate the reservoir's choppy waters and immerse yourself in the rugged beauty of Alberta's landscape.
2. Chestermere Lake
Just a heartbeat from Calgary, Chestermere Lake emerges as a coveted hotspot for water sports aficionados. Its vast, shimmering waters are a thrilling arena for seasoned paddlers craving an adrenaline-fueled challenge. Encircled by a dynamic community and offering an array of recreational amenities, Chestermere Lake is the ultimate destination to immerse yourself in an electrifying SUP adventure.

Source: Wikimedia Commons
- Water Type and Skill Level: Man-made reservoir, suitable for advanced paddlers.
- Launch Points: Multiple public access points, including Anniversary Park and Beach and Cove Beach Hand Launch.
- Unique Feature: Featuring a sandy beach, home to various fish species, popular for fishing and various water activities.
3. Barrier Lake
Nestled within the sprawling 4,210 square kilometers of Kananaskis Country, Barrier Lake covers an area of about 2.9 square kilometers. As a reservoir, its waters can occasionally turn from placid to challenging due to changing winds. With the backdrop of Alberta's magnificent mountains and given its vast expanse, this lake beckons advanced paddle boarders seeking a blend of beauty and challenge.

Source: Wikimedia Commons
- Water Type and Skill Level: Not very deep water, but changeable winds, ideal for advanced paddlers.
- Launch Points: Boat launch in Barrier Dam Day Use Area.
- Unique Feature: Surrounded by craggy peaks and alpine forests, a sandy beach area for barbecues and camping.

Paddle boarding Adventure Awaits in Calgary!
So, what are you waiting for? Don't let another season slip by without experiencing the magic of paddleboarding in Calgary! Explore iROCKER's extensive range of inflatable paddle boards and gear to find the perfect fit for your skill level and embark on a memorable SUP journey. Ignite your spirit of adventure and create lasting memories on the enchanting waters of Alberta's beloved city.

Paddle boarding Kingston is rising in popularity as it offers a variety of wonderful and diverse experiences. Located on the shores of Lake Ontario, this historic town boasts crystal clear waters, stunning vistas, and calm conditions that even beginner paddle boarders can fall in love with. There are also plenty of areas to quench your thirst for travel alongside paddle boarding spots, including a great collection of waterside restaurants, wineries, biking trails, and museums.
Let’s head on to discover the best spots and rental places in Kingston for your next on-the-board dream adventure.
DISCLAIMER: Before traveling to a paddle location, ensure that the location still allows for paddle boarding and make yourself aware of any rules and regulations in place.
Top 6 Best Places for Paddle Boarding Kingston
Locating the ideal paddleboarding Kingston spots is a challenge because there are so many amazing options. Your preference and paddleboarding skill level will determine your preference, but here are the best options for a start.
1. St. Lawrence River
The St. Lawrence River forms part of the border between Canada and the United States.

Source: Flickr
Its mix of calm stretches and challenging rapids, various waterfront activities, and scenic beauties of charming old towns and coves offer a one-of-a-kind paddling experience.
- Skill level: all skill levels
- Access points: Jacques Cartier State Park in Morristown, Parc Marie-Victorin in Quebec City, and Old Port of Montreal
- Type of water: flat water, with some light currents in certain areas
- Best time to paddle board: June-August when the water is warm, but Fall months if you want to whale-watch
- Weather conditions: depending on the areas; some have a cool summer, while others can be quite hot with rough wind
- Rental places: plenty along the St. Lawrence river, including KSF and Crysler Park Marina
2. Rideau Canal, Ottawa
Next up in our paddle boarding Kingston top spots is the popular Rideau Canal in Ottawa. As you glide along this 202-km long UNESCO World Heritage Site in the lush green setting, you can spot birds, turtles, and other wildlife.

Larry Farr - Unsplash
The sights of historic buildings and bridges are also a real feast for the eyes. Paddle the full length of the canal or in sections you love then set up your camp for a good rest.
- Skill level: all skill levels, but more ideal for beginners
- Launch points: there are a good bout of public launch ramps in lock stations and campgrounds
- Type of water: calm and flat water in most sections. Kingston and Ottawa ends are mostly free from rough winds. Colonel By Lake may be a bit rough, and the Upper Brewer Locks may have a bit of traffic
- Best time to paddle board: Summer months are calmer, and weekday mornings are great for avoiding traffic
- Weather conditions: Lots of sunny days with light winds but nothing too extreme
- Rental places: Ahoy Rentals, Pattinson’s Paddles, and Dow’s Lake Pavillion are two popular options, and most marinas and local communities along the canal have supply stores
3. The Kingston Waterfront, NY
The Kingston Waterfront is 8 kilometers of both near-shore calm waters and challenging open water. It’s an excellent spot for paddle boarding in Kingston with natural beauties and a vibrant hub for learning the city's history with museums and historical sites.
- Skill level: depending on the sections, beginner to experienced
- Launch points: Lake Ontario Park, Wolfe Island Ferry Dock, Kingston Point Park, and Rondout Creek
- Type of water: calm and flat in some areas (mostly near the shore), and wavy and choppy in others
- Best time to paddle board: year-round, and early mornings and late evenings are often more peaceful
- Weather conditions: be informed of occasional storms
- Rental places: Ahoy Rentals Kingston, A Day Away Rentals
4. Frontenac Provincial Park, Ontario
There are many amazing adventures you can have in the park, both on your paddle board and on foot. Established in the 1970s, this 5000-acre park offers serene lakes, rugged terrains, lush green forests, and stunning trails that are wonderful for a weekend trip paddle boarding, fishing, hiking, and camping.
- Skill level: all skill levels
- Launch points: Big Salmon Lake or South Otter Lake
- Type of water: clear and calm
- Best time to paddle board: summer is good for paddling in Frontenac. The weather is warm and great for swimming. Remember to avoid mosquito season (late spring)
- Weather conditions: keep an eye out for strong winds and thunderstorms before launching
- Rental places: bring your own board or look for a rental place in the nearby towns
5. Millstone River, NJ
The Millstone flows approximately 62 kilometers through Somerset and Mercer counties before joining the Raritan River in the town of Manville. Its long history and recreational opportunities attract locals as well as visitors year-round.
- Skill level: beginner to intermediate
- Launch points: various points, but most popular is Lake Carnegie or Rocky Hill
- Type of water: calm with gentle and visible waves, but some sections are not recommended for getting into the water
- Best time to paddle board: spring and summer months
- Weather conditions: clear skies with light winds, perfect for intermediate paddle boarders and beginners to practice
- Rental places: Local recreation shops in the area should have paddle boards for rent. You can check with Princeton Canoe and Kayak Rental
6. Sandbanks Provincial Park, Ontario
Home to the world’s largest baymouth barrier dune formation, Sandbanks Provincial Park is an ideal location for paddle boarding near Kingston. It has 3 beautiful pristine beaches - the famous Dunes beach, Outlet beach, and Lakeshore beach - with easy access points to the water.
- Skill level: all skill levels
- Launch points: the beaches
- Type of water: calm and flat water, but it can get very busy with lots of traffic
- Best time to paddle board: summer months when the weather is warm, and the water is the clearest
- Weather conditions: hot and humid summer, cold winters, and look out for rough winds even on sunny days
- Rental places: there are shops within the park that have all sorts of amenities, from food to gear rental
7. The Thousand Islands
The collection of 1800 islands located on the St. Lawrence River is a unique set of geographical beauties. The islands range from rocky outcrops to inhabited areas with homes and cottages.

Amanda - Unsplash
From luxury resorts to the best mother nature has to offer, the Thousand Islands promise nothing but a wonderful paddleboarding Kingston experience.
- Skill level: all skill levels; beginners can paddle in sheltered coves and bays while experienced paddlers can venture further out in the open waters
- Launch points: the water is accessible by car, boat, and public transport Some common launch points are in Gananoque, Clayton, Alexandria Bay, and Boldt Castle
- Type of water: relatively calm, but with how diverse it is, there are areas with currents and waves
- Best time to paddle board: peak season is from July to August when the weather is nicer, but you can enjoy a leisure paddle board adventure in September as well. Avoid crowded hours of late mornings and early afternoons
- Weather conditions: the area is subject to unexpected changes in temperatures and wind conditions, so do your research before launching
- Rental places: check out 1000 Islands Kayaking Co in Gananoque and Ahoy Rentals
Where Can You Rent SUP in Kingston?
Paddle boarding in Kingston is a fantastic experience. Renting a SUP might not be a big deal for experienced paddlers of the area, but for a first timer, there is just one option too many.
Here are some of our suggestions.
- Ahoy Rentals: It’s been a popular name in the paddle-boarding Kingston scene. They have everything from kayaks and paddleboards to bikes and pedal boats. The staff is friendly and knows their stuff, but the choices for paddle boards can be a bit limited during peak season. The price range is from $20 per hour to $60 for a full-day rental.
- Trailhead: Its location is convenient for many paddlers in Kingston. They offer SUP lessons and rentals for newcomers. Their for-sale SUPs tend to be on the pricier side, but the quality and convenience can be worthwhile for some. The price range is from $20 on weekdays to $90 on weekends.
- Boutique de la Baie: They offer a variety of rental services along with SUP in a beautiful bay area. SUPs come in a variety of styles and sizes for different skill levels. Peak seasons may require advance reservations. The price range is from $20/hour to $66/6 hours with the options for lockers and flotation vests.
However, it’s better to have your own SUP. Rental costs add up quickly, and it’s not guaranteed that you can rent the one you want all the time. Having your own paddle board offers more flexibility and freedom of choice.
Check out iROCKER SUPs. There are a wide range of boards, from styles and types to prices.
Safety Tips When Paddle Boarding in Kingston
Having fun paddleboarding requires ensuring safety, just like with any other outdoor sport.

Practicing these safety tips is essential to have a memorable, thrill-filled, and exciting day of paddle boarding in Kingston.
- Always wear a floatation device, even if the water appears flat and current-free
- Make sure to do your research before heading out into the water. There might be high winds and sudden storms that can make paddle boarding dangerous
- Practice gear safety by checking for flaws and any defects - both on your SUP and your clothing - before launching
- Know your waters. This means learning the way of the currents, the temperature, and the behaviors of the currents
- Inform someone of your whereabouts and schedule beforehand when paddle boarding in spots outside the cell coverage area.
Enjoy Paddle Board Journey in Kingston with iROCKER
You’ve got your pick for the best paddle boarding Kingston spot. Now, it’s time to up your game with a great SUP board with iROCKER.

From seasoned to newbies, everyone can have their share of an unforgettable experience in the waters of Kingston with an iROCKER SUP board. They are sturdy and come with dual and triple-layer construction. Plus, there is fast shipping and a flexible return policy, so you can get all you need for a perfect paddle-boarding adventure in Kingston.
For more new and unique paddle boarding spots to launch your next adventure, get Blue Adventures today! Download the app now and paddle your way to unforgettable experiences.
Paddle Boarding Kingston FAQs
1. What types of SUP do I need to paddle board in Kingston?
An all-round paddle board is a versatile option that works well with the waters of Kingston. It’s stable enough, with great maneuverability and good tracking, for a leisurely glide in the calm water near the shore and an active adventure in the open waters. You can start with a classic BLACKFIN MODEL X or an IROCKER CRUISER.
2. What are tips for better lake paddle boarding?
While they share some key techniques, ocean SUP and lake SUP are not the same. Regardless of whether you’re switching from ocean paddle boarding or not, to get better at lake paddle boarding, you have to understand the environment and get a board that works best for it.
All lakes have their own rules and guidelines. Make sure you adhere to them before engaging. Also, remember to always practice safe paddle boarding.
3. What are other locations to paddle board in Ontario, Canada?
Algonquin Provincial Park and Killarney Provincial Park are two great destinations for paddle boarding in Ontario, both for beginners and experts.
 Jason Ng - Unsplash
The old and famous Algonquin Provincial Park is known for its stunning lakes, such as Lake Opeongo and Cedar Lake. Its calm and serene water makes it a perfect place for peaceful paddle boarding and camping.
Finding a place that can beat Killarney Provincial Park in terms of natural beauty is hard. The park features the famous Killarney Lake, which is surrounded by beautiful pink granite cliffs and offers calm waters for paddle boarding.