
Stories

Winnipeg is a vibrant city with scenic rivers and expansive lakes, marrying its urban energy with the tranquility of nature. From calm rivers to expansive lakes, the diversity of waterways provides an ideal setting for all skill levels. Whether you're seeking a peaceful paddle in serene waters or an adventurous journey through scenic landscapes, Winnipeg's best paddle boarding spots have something for everyone. Let's take a closer look at the 12 best places to paddle board Winnipeg.
DISCLAIMER: Before traveling to a paddle location, ensure that the location still allows for paddle boarding and make yourself aware of any rules and regulations in place.
1. The Forks
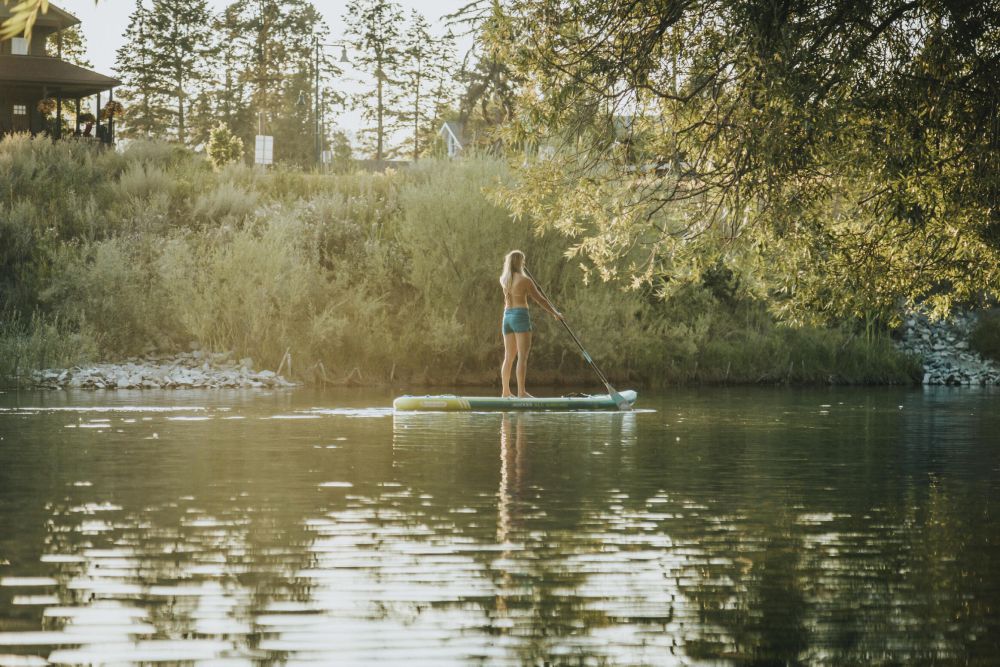
At the heart of downtown Winnipeg, where the Red River and Assiniboine River converge, lies The Forks. It is a cultural and historical hub and also a fantastic starting point for paddle boarding Winnipeg.

source: unsplash
The calm waters make it perfect for beginners, offering breathtaking views of the city skyline and the Canadian Museum for Human Rights.
- Skill Level: Beginner-friendly, with flat and calm water conditions that are perfect for newcomers to paddle board Winnipeg.
- Launch Points: Paddlers have access to convenient launch points at The Forks Harbour or The Forks Canoe and Kayak Launch.
- Access: The area is freely accessible to the public, welcoming everyone to enjoy its waters.
- Unique Feature: The Canadian Museum for Human Rights is a breathtaking architectural landmark visible from the river, offering an unparalleled backdrop for your paddle boarding adventure.
- Time to get there from Winnipeg: Located in downtown Winnipeg, it's accessible within minutes from anywhere in the city.
2. Red River
The wide and majestic Red River brings a dynamic paddle boarding experience, with conditions varying from tranquil to challenging based on the season. It's an awe-inspiring waterway that cuts through the city, providing paddlers with a unique vantage point to explore Winnipeg's stunning skyline, historic sites, and natural beauty from the tranquility of the water. The river's accessibility from various points allows for numerous adventures.
- Skill Level: Suitable for intermediate to advanced paddlers, especially during times of faster currents.
- Water Type: The water conditions vary seasonally from calm to fast-flowing, offering a diverse paddle boarding experience.
- Launch Points: Popular launching spots include Kildonan Park, Maple Grove Park, and Whittier Park, each providing unique views and challenges.
- Access: Public and free access along various points of the river encourages exploration.
- Unique Feature: The Esplanade Riel pedestrian bridge near The Forks is a striking landmark that paddlers can admire from the water.
- Time to get there from Winnipeg: From immediate to 20 minutes, depending on your starting point in the city.
3. La Salle River
A quieter tributary of the Red River, the La Salle River offers a peaceful paddle through southern Winnipeg. Its gentle flow, surrounded by lush greenery and abundant wildlife, is ideal for beginners. It's an excellent place for beginners to get comfortable on the water or for experienced paddlers to enjoy a peaceful day surrounded by nature.
- Skill Level: Beginner-friendly, with slow-moving waters that are easy to navigate.
- Water Type: Calm and steady, ideal for a relaxing paddle boarding experience.
- Launch Points: La Barriere Park is a popular launch site with a variety of scenic routes.
- Access: The river is accessible to the public, with free entry points making it a convenient choice for paddle boarders.
- Unique Feature: St. Norbert Provincial Heritage Park, located near the river, adds a cultural dimension to your paddle boarding adventure, showcasing the life and culture of the Métis people.
- Time to get there from Winnipeg: Approximately 20-30 minutes drive to La Barriere Park from downtown Winnipeg.

source: freepik
4. Whiteshell Provincial Park
An outdoor enthusiast's paradise, Whiteshell Provincial Park boasts over 200 lakes and rivers. Paddle boarding here means gliding through crystal-clear waters, surrounded by pristine wilderness.
From the tranquil waters of Falcon Lake to the mysterious depths of West Hawk Lake, Whiteshell is a paradise for those looking to immerse themselves in the beauty of Canadian Shield country. Its clear waters and diverse landscapes provide a perfect backdrop for both tranquil paddles and exhilarating journeys.
- Skill Level: Ranges from beginner to advanced, catering to all paddle boarding skills and preferences.
- Water Type: Offers a mix of flat, calm lakes and more challenging water bodies, perfect for a variety of paddle boarding experiences.
- Launch Points: Numerous accessible launch points are available, including those at Falcon Lake, West Hawk Lake, Caddy Lake, and the Whiteshell River.
- Unique Feature: The Caddy Lake Tunnels offer an unforgettable paddle boarding adventure, with tunnels carved through the rock, connecting Caddy Lake to South Cross Lake and North Cross Lake.
- Time to Get There from Winnipeg: Approximately 1.5 hours to 2 hours by car.
5. Seine River
Flowing quietly through Winnipeg's eastern parts, the Seine River is a hidden gem for paddle boarders. Its calm currents and shaded banks offer a tranquil escape, perfect for families and beginners.

source: freepik
The slow-moving waters of the Seine River make it an ideal spot for wildlife watching, photography, and simply enjoying the tranquility of nature. As you glide along, keep an eye out for the local flora and fauna that make this river a mesmerizing scene within the city.
- Skill Level: Beginner-friendly, with calm waters that are easy for newcomers.
- Water Type: Slow-moving and steady, providing a safe and enjoyable paddle boarding Winnipeg experience.
- Launch Points: Various public access points along the river, including Bois-des-Esprits Park and John Bruce Park.
- Access: Free and public, with easy access for all wanting to explore the river.
- Amenities: Features like parking, washrooms, picnic areas, and trails are available at different points along the river.
- Unique Feature: The Bois-des-Esprits Forest, with its carved woodland sculptures, offers a magical and inspiring setting for paddle boarders.
- Time to Get There from Winnipeg: Located within Winnipeg, accessing various points along the river can take anywhere from 5 to 20 minutes.
6. Assiniboine River
Experience the essence of Winnipeg by paddle boarding down the Assiniboine River. It is a central piece of the city's landscape with a diverse paddle boarding Winnipeg experience that ranges from peaceful floats through scenic parklands to more adventurous journeys past urban backdrops.
With its relatively gentle flow, the Assiniboine River is suitable for paddle boarders of all skill levels, making it a popular choice for those looking to explore Winnipeg's natural and urban environments from the water.
- Skill Level: Welcomes all levels, from beginners to advanced paddlers.
- Water Type: Mostly calm with a gentle current, perfect for a relaxing paddle boarding experience.
- Launch Points: Various access points are available, including those at Assiniboine Park and Omand’s Creek Park.
- Access: The river is easily accessible and free to the public, encouraging everyone to enjoy its waters.
- Amenities: Depending on the launch point, amenities can include parking, washrooms, picnic areas, and playgrounds.
- Unique Feature: Paddling along the Assiniboine River offers views of significant landmarks, such as the Manitoba Legislative Building, adding a cultural touch to the paddle board Winnipeg adventure.
- Time to Get There from Winnipeg: As it flows through Winnipeg, access points can vary from immediate to about 20-30 minutes drive from downtown.
7. Sturgeon Creek
Ideal for first-timers, Sturgeon Creek's slow-moving waters provide a safe and serene environment for learning to paddle board Winnipeg. The creek's lush surroundings create a picturesque backdrop for a leisurely day on the water, with the historic Sturgeon Creek Bridge serving as a charming landmark.
- Skill Level: Perfect for beginners due to its calm waters and easy navigation.
- Water Type: Slow-moving and gentle, ensuring a smooth paddle boarding experience.
- Launch Points: Accessible launch points can be found along the creek, such as at Sturgeon Creek Park and Woodhaven Park.
- Access: The creek is publicly accessible, offering a hassle-free paddle boarding outing.
- Unique Feature: The historic Sturgeon Creek Bridge provides a picturesque spot for paddling with its elegant design from the water.
- Time to Get There from Winnipeg: Situated in the western part of Winnipeg, it's about a 10-20 minute drive from downtown.

source: freepik
8. FortWhyte Alive
For a unique paddle boarding experience, head to FortWhyte Alive, where nature and education converge. The area's lakes and wetlands are teeming with wildlife, including a bison herd. FortWhyte Alive's calm waters are perfect for paddlers of all skill levels seeking a tranquil escape or a picturesque spot for wildlife observation.
- Skill Level: Suitable for all levels, from beginners to experienced paddlers.
- Water Type: Calm and flat, ideal for a peaceful paddle board Winnipeg experience.
- Launch Points: Designated launch areas are available for easy access to the water.
- Access: Entry to FortWhyte Alive requires an admission fee, with reservation options available for specific activities.
- Unique Feature: The Bison Prairie is a standout attraction, offering paddlers the chance to glimpse bison in their natural habitat from the water.
- Time to Get There from Winnipeg: Roughly 20 minutes drive southwest of downtown Winnipeg.
9. Oak Hammock Marsh
Oak Hammock Marsh is an ecological treasure that beckons stand up paddle board Winnipeg enthusiasts to explore its vast network of waterways. Known for its rich biodiversity and stunning landscapes, this wetland reserve is a paddle boarder's paradise.

source: freepik
The marsh provides a serene environment to glide over the water, observe hundreds of bird species, and immerse oneself in the tranquility of nature, making it an ideal destination for paddlers seeking both adventure and relaxation.
- Skill Level: Welcoming to paddlers of all levels, with conditions favorable for beginners.
- Water Type: Shallow and calm waters dominate the marsh, making for easy and enjoyable paddling.
- Unique Feature: The Oak Hammock Marsh Interpretive Centre enhances the paddling experience with opportunities to learn about wetland conservation and the marsh's diverse ecosystem.
- Time to Get There from Winnipeg: Approximately 30 minutes by car, Oak Hammock Marsh is easily accessible for a day trip or a prolonged exploration of nature's wonders.
10. Birds Hill Park
Birds Hill Park is a provincial park that offers a variety of outdoor activities. Its lakes and ponds, surrounded by peaceful woodlands and meadows, are perfect for paddle board Winnipeg. The park's ranch adds a unique twist to your visit, offering horseback riding experiences.
- Skill Level: Accessible to paddle boarders of all abilities, with conditions well-suited for beginners.
- Water Type: The park's lakes feature flat and calm waters, perfect for a relaxing day on the board.
- Access: The park is open to the public, requiring a park pass for vehicle entry.
- Time to Get There from Winnipeg: Located about 30 minutes by car from downtown Winnipeg.
11. Lake Winnipeg
As one of Canada's largest lakes, Lake Winnipeg offers an expansive playground for paddle boarders. The historic Lake Winnipeg Lighthouse adds a picturesque element to your paddling adventure

source: unsplash
Moreover, the lake's natural beauty and expansive horizon provide a stunning backdrop for stand up paddle boarding, whether you're cruising along the shoreline or venturing further into the water.
- Skill Level: Offers a range of conditions suitable for both novice paddle boarders and those with more experience.
- Water Type: Conditions can vary from calm near the shore to more challenging in open water, catering to different paddle boarding Winnipeg preferences.
- Launch Points: Numerous public access points are available along the lake's shores, including popular spots like Grand Beach and Victoria Beach.
- Access: The lake is publicly accessible, with some areas requiring a park pass or similar permissions for access.
- Unique Feature: Lake Winnipeg's vastness and natural beauty offer an unparalleled paddle board Winnipeg experience, with opportunities to explore secluded beaches and island shores.
- Time to Get There from Winnipeg: An hour's drive from Winnipeg.
12. Fox River
Embarking on a paddle boarding trip to Fox River from Winnipeg is to venture into the wild heart of Manitoba, where the waters speak of ancient landscapes and untold stories. It’s an experience reserved for the daring, ready to explore the raw beauty and untamed spirit of one of Manitoba’s most secluded waterways.
- Skill Level: Best suited for advanced paddle boarders due to its fast-flowing waters and potential for challenging conditions.
- Water Type: The river features a mix of calm sections and areas with stronger currents, offering a dynamic inflatable paddle board Winnipeg adventure.
- Launch Points: Access to the river can be found at designated spots near the Fox River Bridge or the mouth of the river, where it meets Lake Winnipeg.
- Unique Feature: The Fox River Falls, a series of cascading waterfalls along the river, provide a spectacular natural attraction and a breathtaking backdrop for paddle boarding.
- Time to Get There from Winnipeg: Approximately a 3-hour drive from Winnipeg, it is an ideal destination for a multi-day paddle boarding expedition or a long weekend getaway.
Paddle Boarding in Winnipeg with iROCKER
Embark on a paddle board Winnipeg adventure right from the heart of Winnipeg to the stunning natural landscapes that surround it! Whether you're gliding through the historic waters at The Forks, exploring the serene beauty of Whiteshell Provincial Park, or challenging yourself on the dynamic currents of the Fox River, there's a perfect spot for every paddle boarder within reach.
But why stop at the water's edge? Unleash the full potential with the Blue Adventures app by iROCKER - your gateway to uncovering locations, plotting your next route, and joining a vibrant community of paddle board enthusiasts just like you.
And what better way to experience waterways than with iROCKER paddle boards? With their durability, stability, and versatility, you're set for any adventure Winnipeg's waterways have to offer.

Welcome, water enthusiasts! If you're in search of the best paddle boards for women, you've paddled to the perfect spot. In this comprehensive guide, we present the crème de la crème of our offerings, handpicked to complement the unique needs and preferences of the female adventurer.
What Makes Paddle Boards Women-Friendly
When choosing a stand-up paddle board (SUP) for women, certain key elements are essential.
- Weight: In the world of SUP, light as a feather doesn't mean light on the fun! The ease of transport, carrying, and controlling lightweight boards makes them a favored choice. Designs crafted for women offer lightweight portability, ensuring convenience without skimping on strength and durability.
- Size: Size isn’t everything when it comes to a supreme SUP experience. Boards tailored for women are often slightly smaller, accommodating the average female height and reach. This means fewer awkward moments of overreaching and more comfortable paddle strokes!

- Stability: The "wobbles" should be left for the jellyfish, not for you on your board! A stable board instills confidence, especially for novices, making every paddle stroke a steady dance on the water. Crucial design attributes like board width and hull type lend stability to women's paddle boards.
- Build Quality: Elegance and endurance can coexist, and your paddle board is proof! High-quality construction promises long-lasting performance. Paddle boards for women should possess top-notch materials and superior manufacturing techniques to provide a fantastic balance between lightness and durability.
- Design: Why should fashion be confined to land? Stylish, chic, vibrant - these are not just adjectives for your summer wardrobe but for your paddle board too! Women's paddle boards often feature radiant colors, contemporary patterns, and exclusive designs, transforming them into floating masterpieces that stand out amidst the waves.

Top Picks: Best Paddle Boards for Women
Below are our top picks for the best paddle boards for women:
iROCKER CRUISER 10'6" ULTRA
Graceful, stable, and lightweight, this board is an absolute delight for cruising, exploration, and SUP yoga. Its thoughtful design and lightweight build contribute to its exceptional stability, allowing riders to confidently navigate various water conditions. Whether you're gliding along calm lakes or paddling through gentle waves, this board offers a smooth and enjoyable experience. Its versatility makes it a go-to choice for paddlers seeking a board that can handle different activities with ease.
iROCKER ALL AROUND 10’ ULTRA™
The ROCKER ALL AROUND 10' ULTRA™ is the epitome of convenience and versatility. Its easy-to-handle design makes transportation a cinch, allowing you to take it on all your adventures without hassle. Its adaptability and maneuverability make it suitable for various activities, from leisurely cruises to catching small waves.
BLACKFIN CX ULTRA™
This is for women who seek speed, crave higher-intensity workouts, or wish to dip their toes into racing. The BLACKFIN CX ULTRA™ is a sleek and dynamic paddleboard that delivers unparalleled high performance. With the BLACKFIN CX ULTRA™, you can confidently take on any challenge and experience the exhilaration of high-speed paddling.

BLACKFIN MODEL X
This extra-wide board boasts a slender tail – the ultimate fusion of stability and speed. Tailored for petite to plus-size riders, it also comfortably accommodates a second rider or a little furry companion. The board even features functionality to mount a kayak seat for the second rider or a 25L hard cooler to pack a picnic or double up as an extra seat.
Your Perfect Match: Guide to Choosing Your Paddle Board
Brace yourself, adventurers! You're about to embark on a thrilling quest to find the perfect paddle board that matches your passion, personality, and prowess.
Understanding Features:
Discover the diverse aspects of paddle boards and unlock a captivating world on the water. Dive into the essentials: hull type, deck pad, fins, and volume. These components shape your board's performance. Hull controls speed and stability, deck pad ensures grip and comfort, fins navigate steering and tracking, and volume determines buoyancy. Understanding these elements will elevate your SUP experience and aid in selecting the perfect board for your style, skill, and comfort.
Reading Reviews:
User reviews can be a treasure trove of honest feedback about real-world performance and potential issues. Leverage this wealth of information to make an informed choice.
Comparing Prices:
Ensure you're getting the most bang for your buck by comparing prices across various brands and models.
Personal Preferences Matters:
Ultimately, the best paddle board for you is one that fits your personal preferences, including your skill level, the type of paddle boarding you plan to do, and aesthetic choices.
All in all, with these practical guides in hand, let’s throw caution to the wind, and let the waves guide your SUP exploration. Familiarize yourself with your destined board and transform every paddle stroke into a thrilling adventure!

Adventure Awaits!
Don't let anything hold you back – not even the daunting task of choosing the perfect board. With this guide from iROCKER to the best paddle boards for women, you're equipped to make a confident decision. Go ahead, seize your perfect paddle board match, and let your waterborne adventures unfold in all their glory!

Embark on an unforgettable Canmore paddle boarding journey through the breathtaking landscapes of Banff and Canmore. Whether you're a seasoned paddler or embarking on your first water adventure, this guide spotlights the 17 best places for Canmore paddle boarding, exploring serene lakes and rivers nestled within the majestic Rocky Mountains.
From the tranquil waters of The Bow River in Canmore to the iconic vistas of Lake Louise in Banff, each location offers a unique paddle boarding experience. Find hidden gems near Canmore and Banff that promise unmatched beauty and solitude. Equip yourself with iROCKER and navigate these pristine waters using the Blue Adventure app, your essential guide to the best Canmore paddle boarding spots.
DISCLAIMER: Before traveling to a paddle location, ensure that the location still allows for paddle boarding and make yourself aware of any rules and regulations in place.
4 Best Spots for Canmore Paddle Boarding
Let’s explore the best paddle boarding spots in Canmore. These picturesque locations offer serene waters and stunning views for your paddleboarding adventures:
1. The Bow River
If you're looking for a great spot to go Canmore paddle boarding, the Bow River is a popular choice. This gentle river flows through Canmore, Banff, Cochrane, and Calgary and offers stunning views of natural and urban scenery.

Paddle boarding on the Bow River is an excellent way to enjoy a beautiful summer day. If you're staying at a hotel in downtown Banff, you don't have to go far to rent a SUP. It's just a short walk from the center of town, where you can rent a canoe, kayak, or SUP. Rental options range from hourly to daily. Once you're at the Banff Canoe Club, you can head up the Bow River to explore some of the area's natural beauty.
- Water types and level skills: The gentle flow of the Bow River merges into Vermillion Lakes and moves at a slower pace than other sections of the river.
- Launch Points: Start from the Banff Canoe Club.
- While much of the Bow River is fast-moving and intense and almost suitable for intermediate to advanced levels, there is a calm section with plenty of space for beginners to explore.
Note: More suitable spots exist for intermediate and experienced paddlers where flowing water can present challenging conditions. As a minimum safety measure, we recommend wearing a 50N buoyancy aid.
2. Quarry Lake
One cannot discuss the best places to go Canmore paddle boarding without mentioning Quarry Lake. It is a famous spot among water sports enthusiasts in town.
Quarry Lake is the smallest lake on this list, and it's generally very calm, making it an excellent option for beginners wanting to try stand-up paddle boarding in Canmore. Locals love Quarry Lake since it's a stunning man-made lake and a great place to hang out.
- Water Type and skill levels: Calm lake surrounded by mountains and friendly to beginners.
- Launch Points: Easy access from the shore.
-
Amenities:
- The Quarry Lake Park is situated on Spray Lakes Road and can be accessed via car, bicycle, or by foot from Canmore. Once you're there, you can enjoy the ample grassy areas and picnic benches to relax and have some snacks and beverages after your paddle.
- There is a dog park where dogs can roam free without a leash, several picnic benches, and a beautiful walking trail for a delightful outdoor experience.
Note: Unsurprisingly, this site is very busy during the summer, so if you want to avoid the crowd, head out early.
3. Canmore Reservoir
Canmore Reservoir is a popular paddle boarding spot in Canmore that is easily accessible from the town center and is no more than an hour's drive from Banff.

The reservoir's beautiful blue waters reflect the spectacular surrounding landscape, and the waters are usually calm, making it a perfect spot for beginners to try their paddling skills. If you're a resident of Canmore or nearby and looking for a great place to paddle board, Canmore Reservoir is one of the easiest and most spectacular choices available.
- Water types: This tranquil reservoir has scenic views and is suitable for families and beginners.
- Launch points: Easily accessible from the shore entry.
-
Places to go:
- If you plan on staying in Canmore, there are multiple places in nearby Kananaskis Country where you can go for stand-up paddle boarding (SUP). The Canmore Reservoir, located just outside of town, is perhaps the most favored spot for SUP in Canmore.
- You can enjoy breathtaking views of Mount Rundle, the Three Sisters, and Ha Ling Peak.
Note: Come here in the evenings since the water is often warmer than elsewhere in the Rockies, and the reservoir is less impacted by wind than other bodies of water.
4. Goat Pond
If you're searching “Canmore paddle boarding near me,” one of the results that often gets overlooked is Goat Pond. Goat Pond is actually a tiny little lake that's located just outside of Canmore.
Although it's just a small lake (less than 6km in length, in fact), it's absolutely packed with wildlife to discover as you paddle through. The surrounding area is also incredibly popular with hikers and is a great place to spend a fun day exploring the great outdoors.
- Water types and skill level: Calm lake with mountain vistas, great for beginner and intermediate paddlers.
Note: Goat Pond is a small lake located up the Smith Dorrian Road, past EEOR and Ha Ling Peak. It's a great spot for paddling as it's not affected by winds, is rarely busy, and offers stunning views. If you're looking to escape the crowds in Banff on weekends, you should definitely check out Goat Pond.
9 Best Spots for Paddle Boarding in Banff
Next, let’s explore the best paddle boarding spots in Banff National Park. These stunning locations offer serene waters and breathtaking views for your trip.
1. Vermilion Lakes
Vermilion Lakes is largely a marsh, so it doesn’t hold the brilliant blue waters like many other lakes around Banff, but it still makes for an incredible place to SUP.

source: unsplash
Vermilion Lakes are prime habitats for wildlife, and they’re well-known spots for birders. We’ve personally seen beavers, bald eagles, owls, elk, muskrats, and herons.
- Water types and skill levels: Calm and serene. The lakes are well-protected from winds and have shallow waters, making it easy for beginners and families to kayak, canoe, or SUP.
- Launch points: The docks also make it easy to enter the water, and you don’t even have to get your feet wet. Accessible right along Vermilion Lakes Road, near the entrance to the town of Banff.
- Unique features: The three Vermilion Lakes are connected by winding waterways. As you paddle through beautiful forests, you will be flanked by magnificent mountains. The first lake is particularly amazing.
2. Johnson Lake
Johnson Lake is a serene body of water located just a short distance from Lake Minnewanka Loop Road. While it may be smaller than other lakes in the Canadian Rockies, Johnson Lake boasts some of the warmest water in the area, making it a popular spot for water sports enthusiasts.
We particularly enjoy taking a leisurely paddle on the lake in the morning or evening, as it's conveniently located near Banff town and the Two Jack Lake campsite. The lake also offers breathtaking views of Cascade Mountain towering over the lake. With its calm waters, Johnson Lake is an ideal location for stand-up paddle boarding or even swimming if you're feeling adventurous. Be sure to keep an eye out for a rope swing - it's a fun way to enjoy the lake!
- Water types and skill levels: Refreshing alpine water. Its manageable size, lack of crowds, and protection from the wind make it a great spot to SUP in Banff, suitable for all levels.
- Launch Point: Easily accessible from the shore, making it convenient for launching your paddle board.
Note: You should try an evening or morning paddle as it's not too far from Banff town and very close to Two Jack Lake campsite.
3. Cascade Ponds
If you're driving on the TransCanada Highway, you'll notice Cascade Ponds next to Johnson Lake. It's an ideal spot for beginners who want to try out paddle boarding.

source: freepik
The place offers a beautiful view of Cascade Mountain, with easy-to-follow trails and shallow waters. Please note that you'll need to bring your own paddle board to enjoy the peaceful ambiance of this spot.
- Water type and skill levels: The water is still freezing, but there are plenty of areas of Cascade Ponds that are calm and shallow, which are beginner-friendly.
- Launch points: Accessible from the shore, with some faint street noise due to proximity to the highway.
4. Two Jack Lake
Two Jack Lake is a stunning emerald green lake located in Banff National Park and is just a ten-minute drive away from Banff. It's one of the most photographed lakes in the Canadian Rockies due to the breathtaking views of Mount Rundle.
It's also a popular place for paddling, so it can get crowded on a nice day. However, it's a fun experience as everyone enjoys swimming, kayaking, or floating around. We love to pack a lunch and spend some time relaxing on the lake.
- Water types and skill levels: Although its water is not as blue as other lakes in the park, the striking teal tint in the right light is still noteworthy. Beginner to intermediate paddlers will enjoy the fantastic mountain views surrounding the lake, which is shielded from wind by steep forested banks.
- Launching points: One of the reasons this is one of our top Canmore paddle-boarding choices is because it's so easy to launch. You can drive up next to the water to unload your SUP gear and accessories before launching in the shallow waters.
Note: It is advisable to head out early in the morning to experience the calmest conditions and enjoy the best sunrise views, as the wind tends to pick up around midday.
5. Waterfowl Lakes
Waterfowl Lakes are situated along the Icefields Parkway and are two serene lakes in the park that attract fewer visitors than the other lakes in the area.

source: freepik
These lakes are conveniently located on both sides of the Waterfowl Lakes Campground, which we believe is one of the best campsites in Banff National Park.
- Water Type: These two glacial lakes are clear and pristine; they offer stunning turquoise waters that captivate the senses against a backdrop of rugged peaks.
- Skill Level: Intermediate due to potential wind challenges.
- Launch Point: Explore the lakes from various points along the parkway.
- Amenities: Even if you're not camping, a public parking lot provides access to hiking trails around the lake and a classic Banff hike up to Chephren Lake.
Note: The hike to Chephren Lake is easy, so we're considering carrying our inflatable paddle boards in backpacks.
6. Lake Louise
Lake Louise is one of the most breathtaking sites in the world. It's hard to find a more stunning view than paddling through the lake and gazing at Mount Victoria and the Victoria glacier.
The water at Lake Louise has a radiant turquoise blue color, so you don't need any fancy edits on your photographs.
If you have inflatable stand-up paddle boards, you can pack them in a bag and take them on the shuttle bus to the lake. Honestly, it's difficult to find anything that beats paddle boarding on Lake Louise, so it's definitely worth the effort to get there.
- Water Type: Crystal-clear glacial waters with some winds and waves, which are suitable for intermediate to advanced (due to boat traffic).
- Launch Point: Shuttle access or launch from the shore at sunrise for a magical experience.
- Amenities: If you have plans to SUP, you’ll need to arrive early in the morning to secure a lakeside parking spot.
7. Moraine Lake
Moraine Lake is one of the most photographed lakes in Canada, and you can see why when you look at the views. If you’re wondering where to do Canmore paddle boarding and Banff paddle boarding, it’s well worth making the trip to Moraine.

source: unsplash
Moraine Lake
There is likely no lake in the world more beautiful to SUP than Moraine Lake. The magnificent Ten Peaks frame the turquoise waters of Moraine Lake for a splendid scene. It’s an iconic view of Canada and, at one point, was on the back of the Canadian $20 bill. To hop on a SUP here and paddle across the glacial waters is a memory you likely won’t forget.
- Water Type: Glacial turquoise. The waters are an incredible shade of vivid turquoise that intensifies in color throughout the summer as the surrounding glaciers begin to melt.
- Skill Level: Intermediate to advanced (due to boat traffic).
- Launch Point: Shuttle access or launch from the shore.
Note: You’ll need to bring your own paddle board as there are no rentals other than canoes.
8. Herbert Lake
Herbert Lake is a small lake situated near the Icefields Parkway. After passing through the park gates and leaving the TransCanada Highway, you will find its location. Despite being a lesser-known attraction in Banff, the lake's beauty is unparalleled, and it offers breathtaking views of the surrounding mountains.
In the summer, it remains relatively quiet and peaceful. The lake is an ideal spot to enjoy a picnic, and a designated area along the lake shore makes it easy to launch a stand-up paddle board into the water.
- Water Type: Calm and reflective.
- Skill Level: Beginner-friendly.
- Launch Point: Easily accessible from the road.
Note: While you’re paddling around, keep an eye out, as there is a diving board. If you’re brave enough to take a dip in the frigid waters — make sure you pick a warm day.
9. Bow Lake
Bow Lake is considered one of the largest and most stunning sights in Banff, making it an ideal location for stand-up paddle boarding. It's a gentle river that flows through Canmore, Banff, Cochrane, and Calgary and is surrounded by beautiful natural and urban scenery.

source: freepik
Paddling on the Bow River is a popular activity for those who enjoy watersports. It's a great way to spend a summer day.
- Water Type: Flowing water presents more challenging conditions; it is more suitable for experienced paddlers. And wearing a 50N Buoyancy aid as a minimum is a must.
- Launch Point: Explore from various points along the parkway.
Note: The lake can be affected by winds due to its location in the valley. It might take three separate attempts while on the parkway to place our paddle boards here. So, to paddle on Bow Lake, you'll need to catch it on a beautiful summer day with low wind.
5 Best Spots for Paddle Boarding Near Banff and Canmore (Rockies Mountain)
Finally, let’s discover the best paddle boarding spots near Canmore and Banff in the Rocky Mountains. These stunning locations offer serene waters and breathtaking views for your paddle boarding adventure.
1. Barrier Lake
Barrier Lake, located in Kananaskis Country, is a popular destination for stand-up paddle boarding. The lake is stunning and can be reached within an hour from Calgary, as it is situated near the entrance to Kananaskis.

source: unsplash
Barrier Lake is hard to miss, as it is located on your right-hand side when you head towards Kananaskis. Visitors who don't want to travel long distances can come here to paddle, and it's easy to put kayaks or paddle boards in the water from Canmore.
- Water types and skill levels: Surrounded by forested hills, this clear lake is perfect for all skill levels, with soft winds and gentle waves.
- Amenities: Parking is easy on weekdays, and you don't have to carry your paddle board far.
Note: For easier parking and more solitude, it's recommended to arrive early in the morning or late in the evening to avoid crowds during the weekends.
2. Kananaskis Lakes
The Kananaskis Lakes are some of the best lakes to visit in Alberta. The vast area nestled in the Canadian Rockies is perfect for canoeing, kayaking, or paddle boarding. The location is particularly popular during the warm summer months, but it's a beautiful site to paddle on year-round. There is a large parking area and boat launch. Motorboats are allowed on this lake. Kananaskis Lakes includes:
- Lower Kananaskis Lake:
Lower Kananaskis Lake is a stunning alpine lake created by a dam on the Kananaskis River. Surrounded by majestic mountains, it offers breathtaking scenery.
- Water type and skill levels: The lake is generally calm, making it suitable for beginners and experienced paddlers alike.
- Launch Point: You can rent paddle boards from Kananaskis Outfitters at the boat launch. The tranquil waters and mountain views make this spot a top choice.
Note: Be aware that weekends and hot days can get busy, so consider visiting midweek for a more peaceful experience.
- Upper Kananaskis Lake:
The sister lake of Lower Kananaskis, Upper Kananaskis, offers equally breathtaking views of the Rocky Mountains and numerous options for camping and overnight stays. However, this lake is more exposed to wind and the elements, which can make conditions more challenging.
- Water Type and skill levels: The lake can be windier, so be prepared for some work when the winds pick up, which is suitable for intermediate paddlers due to potential wind challenges.
- Launch Point: Access the lake from the Smith Dorrien Trail. Enjoy the views of surrounding peaks as you paddle.
Note: If you're a beginner looking for a place to do Canmore paddle boarding, it's best to stick to Lower Kananaskis. Paddlers must have the necessary skills to handle sudden changes in the wind that can occur frequently here.
3. Emerald Lake
Although it's not exactly located in Banff, Emerald Lake in Yoho National Park is an incredibly beautiful and easily accessible spot for paddle boarding, so it deserves to be included on this list. The best part is that parking here is much less of a hassle than at Lake Louise or Moraine Lake.

source: unsplash
The relatively small size of Emerald Lake makes it perfect for exploration by kayak, canoe, or paddle board. Emerald Lake is a freshwater lake surrounded by lush green forests and framed by the President Mountain Range. Its name perfectly captures the vivid turquoise hue of its waters, which result from glacial melt feeding into the lake.
At times, you may have to park your car quite far from the lakeshore, and that's when you can unload your paddle boards first and then park afterward.
- Water Type and skill levels: Stunning turquoise lake surrounded by peaks. Expect varied scenery as you paddle around the lake. The water's color changes with clouds, and new mountains come into view. The lake's glassy, green waters offer a serene paddle boarding experience for beginners and intermediates.
- Launch Point: To access the lake, head to the canoe rental area. From there, follow a path past the washrooms to reach the launch point.
Note: Arrive early, as the parking lot tends to fill up quickly during peak times.
Paddle Boarding in Canmore and Banff with iROCKER
Discover the essence of the majestic Banff and Canmore paddle boarding regions by exploring the 17 most captivating spots listed in our guide. From the serene waters of The Bow River to the breathtaking views of Moraine Lake and the hidden gems of the Rockies Mountain, like Emerald Lake, your next unforgettable journey on the water awaits.

Starting stand up paddle boarding is a great way to enjoy beautiful water views and get a full-body workout. SUP workout strengthens your body from your feet to your arms as you paddle through calm lakes or ocean waves. Sometimes, you can't get to the water, but you can still do SUP exercises at home to prepare for your next paddle. In this guide, we'll cover at-home exercises to improve your core strength, balance, and endurance to equip you for any SUP challenge. Whether you're new to paddle boarding or have lots of experience, these exercises are perfect for staying fit and improving your paddle boarding skills until your next time on the water.
1. Paddle Squats
Paddle squats are a basic but effective paddle board exercise. Stand with feet shoulder-width apart, simulating holding a paddle overhead. Squat deeply while keeping your back straight, engaging your quads, hamstrings, glutes, and calves, as well as your upper back by holding the "paddle" in place. You can enhance the difficulty level by making the squats in a lowered position for an extra 1-2 seconds in each session.

2. Jumping Lunges
Jumping lunges add a bit of a challenge to your paddle board workout. They're great for improving your leg power and your ability to stay balanced on a moving board. Start in a lunge, jump up to switch legs, and land in a lunge with the other leg forward. It helps to build muscle but also gets you better at making quick balance adjustments, just like you would on a paddle board.
3. Plank Walkouts
From a standing position, bend at the waist and walk your hands out to a plank position. Walk your hands back and return to standing. This movement targets a wide range of muscles, making plank walkouts ideal for improving your core strength, flexibility, and stability.
Moreover, plank walkouts help to increase flexibility in the hamstrings and lower back, areas that can become tight from paddle boarding.
4. Press Ups
Press ups are perfect for a stand up paddle board workout because they work the chest, shoulders, and triceps – all muscles you use a lot when paddling. Doing press ups, where you start in a plank and then lower and raise your body, helps you paddle longer and stay stable on your board.

5. Plank T Rotations
Adding plank T rotations to your SUP workout routine makes your core and shoulders stronger. You do this by starting in a plank, then turning to the side and lifting one arm up to the sky, making a 'T' shape. A stronger core and shoulders mean you can balance better on your paddle board and keep paddling without getting tired.
6. Kick Throughs
Kick throughs add some fun and challenge to SUP workout exercises. They make you more flexible, strengthen your core, and improve how well you coordinate your movements. You start on all fours, then kick one leg under your body to the other side, which helps with the kind of quick, agile moves you need on a paddle board, making you more stable and in control.
7. Side Lunges
Side lunges are great for anyone's paddle board workout, helping you work on your legs and core—important for staying balanced on your board. You step wide to one side, bend that knee while keeping the other leg straight, and then push back up.
Doing side lunges means you're practicing moving side to side, like adjusting your stance on a paddle board, making it easier to keep your balance on the water.
8. SUPerman Plank
The SUPerman Plank is a fun twist on your paddle board exercise routine, aiming to improve balance and core strength. You start in a plank, then lift one arm and the opposite leg, just like flying. This move trains your body to stay stable and strong, much like keeping your balance on a moving paddle board.

9. Burpees
Burpees bring energy to your paddle board workout, working out your whole body and boosting your heart rate. You jump up, squat down, kick your feet out into a plank, do a push-up, and then jump back up. They're great for building the kind of strength and stamina you need for paddle boarding, helping you paddle stronger and stay on your board longer.
10. Chop Exercise and Lift Exercise
These two exercises for improving strength, coordination, and overall fitness are called the Chop Exercise and Lift Exercise. We'll provide insights on how to perform them correctly, their benefits, and variations to keep your workouts fresh and effective.
10.1. Chop Exercise
The Chop Exercise mirrors the forward stroke in paddle boarding, focusing on core rotational power and balance. It targets your abdominals, obliques, glutes, and leg muscles.
- Set Up: Tie a resistance band to something solid and sturdy above shoulder height.
- Get Ready: Stand next to where the band is tied, reach up with both hands to grab the band, and bend your knees a bit.
- Do It: Pull the band down across your body, turning your upper body. Keep your arms straight and let your stomach and back muscles do most of the work.
- Repeat: Do this move 15 times, switch sides, and do it again.
- Rest and Adjust: Rest for a bit if you need to, and make the exercise harder or easier by changing how tight the band is.
10.2. Lift Exercise
The Lift Exercise, or the "reverse chop," is like doing a paddle stroke backwards. It's great for improving your balance and making your core muscles stronger, especially the muscles in your stomach, sides, backside, and upper legs.
- Set Up: Tie a resistance band low down, near the ground.
- Get Ready: Stand sideways to the band, hold onto it with tension, ready to pull.
- Do It: Lift the band up and across your body, turning your upper body and straightening one leg as you go.
- Repeat: Do 20 lifts, switch sides, and do 20 more.
- Keep It Even: Try to keep the pull smooth and adjust the band to make sure it's just right for your strength.
11. Hip Clock Exercise
The Hip Clock Exercise is a simple yet effective part of any SUP workout or paddle board exercise plan. It focuses on making your glutes and hamstrings stronger and improving your balance, which helps you stay up longer on your paddle board.

- Start Position: Stand on your left leg with a slight bend in the knee, keeping your back straight and your weight centered.
- Movement: Pretend you're standing in the middle of a clock. Lift and stretch your right leg forward to point to 12 o’clock.
- Return: Bring your leg back to the starting position.
- Directional Moves: Continue by reaching 3, 6, and 9 o’clock with your leg. Keep your balance steady, and don't let your hips sway.
- Switch Sides: Repeat the exercise on your right leg, completing 5 to 8 sets for each leg.
Helpful Tips: Make sure your hips are steady. If you're wobbling, just make smaller moves. This exercise is great for anyone doing a SUP workout, paddle board workout, or paddle board exercise, as it builds up the important muscles and balance you need for paddle boarding.
12. Swiss Ball Exercises
Swiss ball exercises are an excellent addition to any stand up paddle board workout, and a fun and challenging way to improve core strength, balance, and upper body power.
12.1. Swiss Ball Pike
For paddlers looking to strengthen their core and shoulders, the Swiss Ball Pike is ideal. You'll start with your feet on the ball and hands on the ground, then lift your hips up to form a V shape, which helps prepare your shoulders and core for the demands of paddling.
12.2. Swiss Ball Tuck Through
The Swiss Ball Tuck Through focuses on core and upper body strength. With your hands on the ground and feet on the ball, you'll pull the ball towards your hands, tucking your knees in. It's great for building the agility needed for quick turns on your paddle board.
12.3. Swiss Ball Lateral Raises
Doing lateral raises with a Swiss ball targets the muscles in your shoulders and back. This exercise, whether done sitting or kneeling on the ball, is great for building upper body strength that supports longer and more efficient paddling sessions.
12.4. Swiss Ball Resistance Paddles
Mirroring the action of paddling with a resistance band while balancing on a Swiss ball adds a realistic element to your workout. This exercise enhances core stability and lower body strength, making it easier to maintain balance on your paddle board.
Adding these Swiss ball exercises to your stand up paddle board workout or paddle boarding workout routine can lead to better performance on the water. They target key areas needed for effective paddling, helping you enjoy a more stable and powerful paddle boarding experience.
13. Bosu Ball Exercises
Bosu Ball routines are a dynamic addition to SUP workout, paddle board exercise, and stand up paddle board exercise, focusing on the weighted paddle, deadlifts, and one-leg balance drills. The instability introduced by the Bosu Ball forces the engagement of core muscles, improving balance and strength for paddle boarding.

13.1. Bosu Ball Weighted Paddle
The Weighted Paddle exercise on a Bosu Ball mimics a paddling motion with added resistance, ideal for building upper body strength. Holding weights to mimic a paddle, you perform paddling motions while balancing on the Bosu Ball. This exercise targets your shoulders, arms, and core, improving your paddling power and endurance on the water.
13.2. Bosu Ball Deadlifts
Performing deadlifts on a Bosu Ball adds an extra layer of balance challenge, emphasizing lower body and core stability. Begin with lighter weights to focus on maintaining balance, and strengthening the hamstrings, glutes, and lower back, all of which contribute to a stronger paddle boarding stance.
Advanced Tip: For paddlers with strong balance, try performing deadlifts on a balance board for an extra challenge. This advanced move can help prevent you from injury because it requires meticulous form to enhance your stability and strength for SUP activities.
13.3. Bosu Ball One Leg
Balancing on one leg atop a Bosu Ball targets stability and core strength, closely mirroring the balance skills needed for paddle boarding. Engage your core and lower body to stay upright, enhancing your ability to stand firm on your paddle board through choppy conditions.
Adding Bosu Ball exercises to your SUP workout or paddle board exercise plan significantly benefits balance, core stability, and muscle strength, preparing you for better performance on the water.
Ready to take your paddle board workout to the next level? Discover how many calories you can burn while paddle boarding in our comprehensive article!
3 Ways to Get Fit on Your Paddle Board
Exploring different ways to stay active and fit on your paddle board not only diversifies your SUP workout routine but also maximizes the benefits of your time on the water. Here are three dynamic paddle board exercises that promise to boost your fitness through a blend of balance, endurance, and strength training.
1. SUP Yoga
SUP Yoga has rapidly gained popularity, blending the calming practice of yoga with the dynamic challenge of balancing on a yoga paddle board. Performing yoga on a paddle board introduces an extra layer of difficulty compared to traditional studio yoga, as it engages more muscles to maintain balance.
The right board, designed with enhanced stability and plenty of deck space, makes all the difference in successfully executing yoga poses. Practitioners particularly enjoy SUP yoga for its ability to connect them with nature, bringing a sense of peace and serenity that enhances the workout beyond the confines of a studio. Ideal for yoga fans looking for a refreshing change, SUP yoga enriches your paddle board workout with its unique combination of fitness and mindfulness.
2. SUP Touring
Long-distance paddle boarding is an effective way to get a great upper body workout, different from what you might do in the gym. It works out your back, shoulders, arms, and abs, giving you a solid paddle board workout. If you're into longer trips on the water, try using a touring paddle board or a racing stand up paddle board.
Touring paddle boards are made to move fast and go far, perfect for a lengthy paddle board exercise session. Paddling for 40 minutes or more can give you a really good workout, making sure both arms get plenty of action. To make your workout even better, try doing pushups on your board, which helps strengthen your chest muscles and make your paddle boarding workout even more complete.
3. SUP Surfing
SUP surfing offers a unique and engaging way to get a stand up paddle board workout. Unlike traditional surfing, paddle surfing is simpler since you start off standing on the board with an easier way to catch waves. The activity provides an excellent stand up paddle board workout, especially for the upper body, due to the extensive paddling involved in wave catching. After a long session of paddle surfing, you'll feel a significant workout effect.
Paddle surfing is not only a top choice for exercise on a paddle board but also adds fun to the fitness routine. For beginners or those curious about paddle board surfing, our SUP surfing article offers thorough details and guidance.
SUP Workout with iROCKER Paddle Board
Dive into the exhilarating world of SUP workout with iROCKER paddle boards, where fitness meets adventure. iROCKER is renowned for making boards that blend stability with agility. With their cutting-edge designs, the boards suit both beginners and experienced paddlers. Get ready for a workout that strengthens your core and boosts your heart rate, all while the beauty of the water surrounds you. Let iROCKER paddle boards turn your fitness routine into an exciting and energetic sport.

Embarking on a water adventure of canoe vs kayak debate? Both are for navigating through water using paddles and have a long history of helping people explore rivers, lakes, seas, and oceans.
So, what sets a kayak apart from a canoe?
Many people use the terms interchangeably, yet each has its own set of characteristics rooted in design, gear, and even their historical paths. Let's delve into the details.
Canoe And Kayak Differences
Diving into the canoe vs kayak discussion reveals that their main difference lies in the design of each vessel.

Canoes have an open-top design that allows paddlers to sit on a bench or kneel, moving forward with a single-bladed paddle. Meanwhile, kayaks have a closed deck with the paddler sitting inside, where paddlers can extend their legs alongside a double-bladed paddle for propulsion in both directions - moving backward and forward.
Here’s a comparison that simplifies the complex:
- Canoe: An open deck vessel where paddlers can sit or kneel using a single-bladed paddle.
- Kayak: A closed deck that seats the paddler with legs extended, navigated with a double-bladed paddle.
For those curious about further exploring the unique aspects of kayak vs canoe, including their historical significance and where you might try them out, stick around.
Different Kinds of Kayaks
With a focus on sit-inside models, the kayak world offers something for every paddler.

| Type | Description | Best For |
|---|---|---|
| Recreational Kayak | Beginner-friendly, stable, easy to paddle, typically sit-in style. | First-time paddlers, calm water exploration. |
| Whitewater Kayak | Longer, less volume for maneuverability, used with a spray skirt. | Navigating rapids, adventure seekers. |
| Sea Kayak | Sleek design for stability in choppy water, made for easier paddling. | Ocean expeditions, long-distance journeys. |
| Touring Kayak | Specialized hull that tracks well in currents, for rough waters. | Extended paddling trips, challenging conditions. |
| Racing Kayak | Long and narrow, built for speed, requires experience. | Competitive racing, speed enthusiasts. |
| Sit-on-Top Kayak | Perfect for fishing, higher vantage point, more deck space. | Anglers, leisure paddling, warm climates. |
| Inflatable Kayak | Good for travel and recreational paddling, easy to store and transport. | Casual paddling, adventurers with limited storage. |
Different Kinds of Canoes
While canoes do not boast as vast an array as kayaks, there's still a variety of choices for different paddling needs and preferences.
| Type | Description | Best For |
|---|---|---|
| Recreational Canoe | Wide for extra stability, made for everyday paddling on calm waters. | Beginners, family outings, leisure paddling. |
| Whitewater Canoe | It is shorter in length with a high rocker for navigating rapids. | Whitewater adventures, experienced paddlers. |
| Racing Canoe | Narrow with a pointed stern, designed for speed. | Racing, paddlers seeking performance. |
History Of Canoes And Kayaks
When we talk about canoe vs kayak, we're unfolding a history that stretches back thousands of years and crosses many cultures. Canoes are some of the oldest boats ever discovered, with the earliest called “the Pesse canoe” - dating back to 8200 BC in the Netherlands. The word "canoe" itself comes from the Carib people, hinting at its ancient roots.
Across the Americas, indigenous peoples relied on canoes for transportation, exploration, and trade. In the cold Arctic regions, the Inuit designed kayaks with wood and animal skins to brave icy waters, which are perfect for hunting.
The sports world caught on to kayaking first, showcasing it in the 1936 Berlin Olympics. Canoeing wasn't far behind, making its Olympic debut 12 years later. These events helped transform both activities from survival techniques to competitive sports and recreational activities enjoyed worldwide.
Now more accessible than ever, canoes and kayaks are paddled and manufactured around the globe using materials like plastic and fiberglass.
The rich history of kayak vs canoe adds depth to every stroke. So, whether you choose a kayak or canoe, you're part of a long tradition of water explorers.
Canoe vs Kayak: Which Is Better?
When the canoe vs kayak comparison comes to life, both canoeing and kayaking come with their own sets of advantages and drawbacks. Ultimately, deciding between a canoe and a kayak hinges on what fits your personal style and situation best.
Pros and Cons: Canoeing
Canoeing provides an excellent opportunity for leisure, fishing, or even camping trips due to its large carrying capacity. However, like any activity, it has its upsides and downsides. Below is a detailed list of the pros and cons of canoeing.

-
Pros of Canoeing
- Easy to get in and out of
- Large space for carrying lots of gear easily
- Comfortable sitting position; can stand up for a good view
- Perfect for longer expeditions with comfort and capacity
- Offers stability and is difficult to capsize
- Easy to learn the basics
- You usually stay dry unless you're in rough water
- Easy for kids or dogs to join on the water
-
Cons of Canoeing
- Big and heavy, difficult to transport
- Can fill with water in whitewater conditions
- Single paddles are less efficient than double paddles
- More effort required to reach top speed
Pros and Cons: Kayaking
Kayaking is known for its diverse styles and the unique feeling of being close to the water. However, mastering kayaking, especially in more challenging conditions, requires time and effort. Here are the pros and cons of kayaking.
-
Pros of Kayaking
- Quick to learn how to start
- Fast with speed, requiring little effort
- Huge variety of kayaking disciplines
- Gear and paddler are kept dry (unless capsizing)
- Light and easy to transport
- Good maneuverability
- Handles whitewater well
- Feel connected with the water as you sit closer
- Double kayak paddles are more efficient than single paddles
-
Cons of Kayaking
- Learning advanced kayaking takes a lot of work
- Transitioning from flat to fast-moving water can be daunting
- Spray skirts can feel restrictive and scary for learners (If you use a spray skirt when the kayak capsizes, the skirt will lock you inside the cockpit
- Double paddles are heavier than single canoe paddles
How to Choose Between Canoeing or Kayaking
Choosing between canoeing and kayaking depends on several factors that reflect your lifestyle, preferences, and the type of water adventures you seek. Here’s a guide to help you decide whether a canoe or a kayak better fits your needs.

What to Consider: Canoe vs Kayak
- Paddling Location: The environment where you'll paddle greatly influences your choice. Canoes are ideal for calm waters like lakes and gentle rivers, while kayaks handle choppy conditions like ocean waves or whitewater better.
- Companions: If you plan to paddle with family or friends, canoes offer more space and are great for group experiences. Kayaks are typically made for solo or duo adventures.
- Trip Type: For day trips or short excursions, kayaks are convenient and easy to handle. Canoes offer more space for gear, making them suitable for longer, multi-day trips.
- Transport and Storage: Consider how you'll transport your watercraft. Kayaks, especially the inflatable or modular types, are easier to carry and store compared to canoes.
Questions to ask yourself before the decision:
- Do you value speed on the water? Kayaks generally offer a quicker ride, whereas canoes are for a more leisurely pace.
- Do you want stability? If you don’t want to rock much on the water, canoes are usually more stable than kayaks.
- Need to turn easily? If you like to zigzag and explore, kayaks are better at turning and moving around.
- Capacity: Planning to take a lot of things with you? Canoes have more room for your stuff.
- Getting in and out often? If you need to get in and out a lot, canoes are easier than kayaks.
Reflect on these aspects and questions to guide your canoe vs kayak decision, which can give you choices to find one that suits your lifestyle.
Fishing: Canoe vs Kayak
Fishing is a blast, whether you're in a canoe or a kayak. If you're leaning towards a kayak, go for a sit-on-top type. They give you more room for all your fishing gear and a higher seat for better views and casting. Kayaks are especially good for ocean fishing. But for a peaceful day on a lake or river, canoes are your best bet – they've got plenty of space for all your fishing gear.
Stability: Canoe vs Kayak
If you're just starting out or a bit wary of the water, canoes are generally more stable and less likely to tip over, thanks to their size and width. This makes getting in and out of them easier too, which is great for beginners or anyone who wants a steadier ride.
Speed: Canoe vs Kayak
When it comes to speed, kayaks usually win the race because their double-bladed paddles let you move faster. But if you've got a friend in your canoe, and you both paddle together, you can get pretty close to kayak speed.
For Beginners: Canoe vs Kayak
If you're new to paddling, picking between a canoe and a kayak isn't so clear-cut. While some folks might find canoes a bit tougher at first, both types need some practice to get the hang of balancing and moving smoothly.
So, for beginners, both canoes and kayaks have their own learning curves.
Family Outings: Canoe vs Kayak
Canoes are ideal for family trips, thanks to their larger size and capacity so you can get multiple people to paddle together.
Kayaking with the family is also possible, but it's more of an individual thing. Everyone, including the kids, might need their own kayak, which is something to think about depending on how comfortable and skilled everyone is.
Canoeing and Kayaking Gear
Whether you decide on kayaking or canoeing, you'll need a similar set of equipment to start your journey on the water.
- Canoe or Kayak: Of course, you'll need either a canoe or a kayak. If buying one seems a bit much right now, check out local rental options to get a feel for what you like.
- Paddle: This is a no-brainer; however, the type depends on your boat. Therefore, opt for a double-bladed paddle for kayaks and a single-bladed one for canoes.
- Helmet: Better safe than sorry, especially when you're near shallow areas or rocky spots. A helmet is a smart choice to keep your head safe.
- Personal Floatation Device (PFD): A life jacket is a must, even for the most skilled swimmers, to ensure safety while paddling.
- Appropriate Clothing: Your outfit depends on the weather and where you're paddling. It could be a neoprene suit, waterproof clothing, or something to shield you from the sun. Dress appropriately for a comfortable and safe trip.
Different Types of Boats Used for Each Discipline
Choosing the perfect boat depends on what kind of paddling you're into. Here's a quick and friendly breakdown to help you find your match:
- Canoe Sprint: Focus on quick and straight-line races, with short to medium distances on flat water. For this discipline, sprint canoes (C1, C2, C4) and kayaks (K1, K2, K4) are suitable with their lightweight and streamlined design.
- Canoe Slalom: Unlike sprints, canoe slalom requires control and precision of the athletes over speed. Slalom boats (K1, C1, C2) are what you are looking for with their maneuver control on whitewater.
- Paracanoe: This one is a boating race for athletes with physical impairments, using traditional kayaks and Va’a canoes (a stabilized version kayak with outriggers attached to them).
- Wildwater Canoe: With the challenging nature of this sport, the kayaks (K1) and canoes (C1, C2) in this discipline are balanced and rugged for navigation in fast-moving rapids, and prioritize durability over speed, unlike the sprint boat models.
- Freestyle: Focus more on the skills and techniques of athletes than a normal race, this category requires compact and highly responsive boats (canoes, kayaks, or squirt boats) to perform tricks and flips with a creative edge.
- Canoe Marathon: These marathons need long-distance canoes/kayaks which prioritize lightweight build for efficient and easy paddling during portaging.
- Canoe Polo: As a team-oriented discipline with great impact collisions during the game, Canoe Polo athletes use rounded and agile kayaks to prioritize stability and safety.
- Ocean Racing: Ocean races need boats with endurance and wave-cutting design to challenge the open water. In this case, surfskis which feature open cockpits designed to cut through any waves are ideal for the discipline.
- Dragon Boats: Focuses very much on collaboration with synchronized group paddling, long, team-paddled canoes are the ideal boat for this discipline.
Top Destinations for Canoeing and Kayaking
Kayaking and canoeing are great activities that you can enjoy in any body of water.
For those just starting out, calm and flat waters are the ideal settings to master the basics of paddling. Peaceful lakes, protected ocean bays, or gently flowing rivers are perfect for beginners. As you grow more confident in your paddling skills, you can challenge yourself with the excitement of whitewater rapids or ocean waves.

So, if you're eager to hit the water and see some beautiful scenery, give the Blue Adventure app a look. You never know, your next great paddling adventure could be just a few taps away!
Embark on Your Canoe vs Kayak Adventure
Embarking on a paddling adventure brings the timeless debate of canoe vs kayak into focus. Whether your heart leans towards the tranquil glide of a canoe or the exhilarating pace of a kayak, each offers a unique path to discovering the wonders of waterways.
Don't let another day drift by. Choose your vessel, be it a canoe or a kayak, and dive into the endless possibilities that await on the water. With iROCKER’s top-notch gear and a world of rivers, lakes, and oceans to explore, your next great adventure is just a paddle away.
FAQs
-
Is it easier to kayak or canoe?
Many consider canoeing to be the easier option for beginners due to its stability. The wider build of canoes helps minimize the risk of capsizing and makes balancing easier.
-
Can you canoe or kayak as a beginner?
Absolutely! Both canoeing and kayaking are beginner-friendly activities. Many beginners find canoeing to be a bit easier to start with due to its stability and simplicity. However, kayaking is also a great choice, especially if you’re interested in exploring different types of waters.
-
How can I start kayaking or canoeing?
Starting is as simple as finding a local club or rental shop. Look for beginner courses in either canoeing or kayaking. Many places offer equipment rentals, so you can try out both to see what suits you best. It's also a good idea to start in calm waters and gradually move to more challenging environments as you build your skills.
-
Can I convert my SUP to a canoe or kayak?
Yes, with the right accessories, such as a seat attachment and the appropriate paddle, you can transform your SUP for a new paddling experience. Check out iROCKER's SUP to kayak conversion kit for an easy and convenient way to enhance your paddling adventures!

If you love stand up paddle boarding and want to take it to the next level, you might want to try SUP surfing. SUP surfing is the exciting sport of riding waves with a paddle board and a paddle. It combines the thrill of surfing with the versatility and control of paddle boarding. In this guide, we will introduce you to the basics of SUP surfing, how to choose the right surf paddle board and some tips and tricks to help you catch some waves.
What is SUP Surfing?
SUP surfing is a form of surfing that uses a stand up paddle board and a paddle to ride waves. Unlike traditional surfing, where the surfer lies on the board and paddles with their arms before popping up into a standing position, SUP surfing allows the surfer to stand on the board and use the paddle to propel themselves and maneuver on the wave.

SUP surfing can be done on any type of wave, from small and gentle to big and powerful, depending on the skill and preference of the surfer.
SUP Surfing vs Traditional Surfing
SUP surfing and traditional surfing have some similarities and differences. Both sports require balance, coordination, and timing to ride the waves. Both sports also offer a lot of fun and challenge for the surfer. However, there are some advantages and disadvantages of each sport that you should consider before choosing one.
Some of the advantages of SUP surfing are:
| Aspect | SUP Surfing | Traditional Surfing |
|---|---|---|
| Visibility of Waves | Better wave visibility. You can see the waves better and catch them earlier since you are standing on the board and have a higher vantage point. | Wave visibility can be limited due to the surfer’s lower vantage point, but experienced surfers develop a keen sense of wave timing and selection. |
| Paddling Ability | Faster and longer paddling since you have the leverage and power of the paddle. | Paddling relies on arm strength and stamina. It may be slower, but it provides a great upper-body workout. |
| Wave Range | Suitable for various wave types, from flat water to choppy conditions, since you have more stability and control on the board. | Typically preferred for certain wave types and conditions, offering high performance in their ideal environment. |
| Exploration | Easy to explore more places and enjoy the scenery since you can paddle to different spots. | Limited exploration capabilities due to the need for waves, surfers can be thrilled by riding waves. |
| Space Requirements | Requires more space and etiquette, since you have a larger board and a paddle that can pose a hazard to other surfers and swimmers. | Requires less space and etiquette due to smaller board size. |
| Physical Demands | Requires more strength and endurance because you have to carry and paddle a heavier board and deal with the wind and current resistance. | It is less physically demanding in terms of carrying equipment but still requires a good level of fitness, particularly for paddling, balancing, and wave riding. |
| Skill Level | It may be easier for beginners to start with. | It requires more skills and practice since you have to balance and maneuver on a bigger board. |
However, individual preference and skill level may also influence which sport is a better fit.
How to Choose the Right Surf Paddle Board
There are many types and models of surf paddle boards, but they can be generally classified into two categories: hard boards and inflatable boards. Hard boards are made of rigid materials like fiberglass, epoxy, or carbon fiber, while inflatable boards are made of PVC or drop-stitch material that can be inflated and deflated.

When choosing a surf paddle board, you should consider the following factors:
Board size:
The size of the board determines its stability, speed, and maneuverability. A larger board will be more stable and easier to paddle but slower and harder to turn. A smaller board will be less stable and harder to paddle but faster and more agile. The size of the board also depends on your weight, height, and skill level.
⇒ As a general rule, beginners should choose a board at least 10 feet long and 30 inches wide, while advanced surfers can go for a board that is 8 to 9 feet long and 28 to 29 inches wide.
Board shape:
- A board with a round nose and a wide tail will be more stable and suitable for cruising and longboarding.
- A board with a pointed nose and a narrow tail will be more responsive and ideal for carving and shortboarding.
- A board with a hybrid shape will be somewhere in between and suitable for all-around surfing.
Fin layout:
Many SUP surfboards come with a tri-fin or quad-fin layout, which provides better tracking and control while surfing.
Board design:
The design of the board includes the rocker (curve), rails (edges), fins, and deck, which influence its performance. More rocker aids in handling steeper waves but reduces speed on flat water. Thin, sharp rails enhance agility, while thick, soft ones offer forgiveness. Besides, more fins increase stability; fewer allow playfulness. A flat, smooth deck ensures comfort, while a concave, textured one provides grip.
Surfing with an Inflatable
Inflatable paddle boards are a great option for SUP surfing, especially for beginners and travellers. This table summarizes the advantages and disadvantages of Inflatable Paddle Boards (iSUPs) compared to Hard Boards:
| Aspect | Inflatable Paddle Boards (iSUPs) | Hard Boards |
|---|---|---|
| Portability and Convenience | Easily deflated and portable, they can be deflated and packed into a backpack or a car trunk. | Less portable and bulkier due to their rigid structure. Require a roof rack or a large vehicle for transportation. |
| Durability and Resistance | Can withstand bumps and scratches without cracking or denting. | More susceptible to damage. May crack or dent on impact, and repairs can be costly. |
| Affordability and Accessibility | More affordable and accessible. They are cheaper and easier to find than hard boards. | Often pricier due to the materials and manufacturing process. But less accessible and usually found in specialty stores or online retailers. |
| Rigidity and Responsiveness | Less rigid, with some flex and bounce when inflated. | Highly rigid with no flex, providing a stable platform, which improves responsiveness and control, especially at high speeds or in rough waters. |
| Performance and Style | Less performance-oriented and stylish because of the simpler and bulkier shape and design. | Provides better performance and style due to their streamlined designs. |
To surf with an inflatable paddle board, you need to make sure that the board is properly inflated and maintained. You should inflate the board to the recommended PSI (pounds per square inch) level, which is usually between 12 and 15 PSI. You should also check the board for any leaks or damages before and after each use. You should also clean and dry the board thoroughly before storing it in a cool and dry place.
Top 2 Surf Paddle Boards
There are many surf paddle boards on the market, but some of them stand out for their quality, performance, and value. Here are the best surf paddle boards that you can choose from:
1. BLACKFIN Model V
The BLACKFIN Model V is a high-quality inflatable paddle board that excels at SUP surfing. It's sleek and sporty, with a pointed front, slim tail, and a curved shape for easy maneuvering. The BLACKFIN Model V is a top-tier inflatable paddle board for SUP surfing.

Its design includes a pointed nose, a narrow tail, and a rocker profile for agility. It's made from triple-layer PVC for strength and features a carbon rail for rigidity. The tri-fin setup enhances stability, and the textured deck pad ensures grip. It is 12'6" long and 32" wide, weighs 30 lbs and can carry up to 485 lbs.
2. iROCKER Cruiser 10'6"
The iROCKER Cruiser 10'6" is an inflatable paddle board that's great for SUP surfing and other water activities. It's stable and smooth, with a wide nose, square tail, and gentle rocker. The board is made of triple-layer PVC, making it rigid and resilient, and it has a tri-fin setup, which adds versatility.

The iROCKER Cruiser 10'6" also has a large and soft EVA deck pad for comfort and grip. It comes with a backpack, dual-action pump, carbon blend paddle, and other accessories. The board is 10 feet 6 inches long, 33 inches wide, and 6 inches thick. It weighs 25 pounds and can hold up to 400 pounds, making it suitable for people of different sizes and weights.
Essential Gear and Accessories for SUP Surfing
In addition to the surf paddle board, there are some essential gear and accessories that you need for SUP surfing. These include:
- Paddle: Acts as your water engine and steering wheel. It should be light, durable, adjustable, and have a comfortable grip and strong blade.
- Leash: Your safety tether to the board. It needs to be strong, flexible, and of appropriate length. It should also have a comfortable cuff and a quick-release feature.
- Personal Flotation Device (PFD): Your water safety vest. It should be buoyant, breathable, comfortable, secure, and highly visible.
- Wetsuit: Provides thermal protection in the water. It should be warm, flexible, durable, well-fitted, and smooth to reduce drag.
- Wax or Traction Pad: Ensures non-slip surface on the board. It should be sticky, cushiony, easy to apply or remove, and provide good coverage for control.
How to SUP Surf
SUP surfing is a fun and challenging sport that requires some skills and techniques. Here are some steps to help you get started:
- Choose the right conditions: Look for small and clean waves that are suitable for beginners. Avoid crowded and hazardous areas that can pose risks.
- Prepare your gear: Check your board, paddle, leash, PFD, and wetsuit to make sure they are in good condition. Adjust your paddle to the right length, which is about 6 to 8 inches taller than you.
- Launch your board: Carry your board to the water and place it perpendicular to the shore. Stand next to the board and hold the paddle with one hand on the handle and the other hand on the shaft. Step onto the board one foot at a time and stand up slowly. Start paddling with alternating strokes on each side to move forward and balance.
- Catch a wave: Paddle towards the wave and turn your board towards the shore. Paddle hard and fast as the wave approaches, and look over your shoulder to see the wave. Lean forward and bend your knees as the wave lifts the board and propels you forward. Stand up straight and shift your weight back as the wave carries you towards the shore.
- Ride a wave: Steer your board with your paddle and your body. Lean on your toes to turn right and lean on your heels to turn left. Bend your knees and lower your center of gravity to absorb the bumps and maintain balance. Extend your arms and look ahead to anticipate the changes and react quickly.
SUP Surfing Etiquette
SUP surfing has its own set of rules that you should observe to respect people and safeguard the environment. Here are a few rules to remember:
- Right of way: The surfer who is closest to the peak of the wave has the right of way. Do not drop in on or snake another surfer who is already riding the wave.
- Paddling out: Do not paddle straight through the lineup where the others are surfing. Paddle around the lineup or duck dive under the waves to avoid interfering with others.
- Control your board: Keep your board and your paddle under control at all times. Do not let your board or your paddle hit or hurt others.
- Respect the locals: Follow the local rules and customs. Do not hog the waves or behave aggressively. Share the waves and the stoke with others.
- Protect nature: Do not litter or damage the beach or the ocean. Do not disrupt the wildlife or ecosystem. Leave no trace and take only memories.
SUP Surfing with iROCKER Surf Paddle Board
SUP surfing is a great way to enjoy the water and the waves. It offers a unique blend of surfing and paddle boarding that is fun, healthy, and accessible to everyone. In this guide, we've shown you how to enjoy the waves by combining paddle boarding and surfing. To make the most of this exciting experience, it's important to pick the right surf paddle board.

With the right surf paddle board and gear from iROCKER, you can ride the waves with confidence and joy. So grab your board, hit the water, and catch some waves!
FAQs
-
Can a paddle board be used for surfing?
⇒ Yes, a paddle board can be used for surfing. In fact, SUP surfing is a popular sport that combines the thrill of surfing with the versatility and control of paddle boarding.
-
What is the distinction between a surfboard and a paddle board?
⇒ The main difference between a surfboard and a paddle board is the size and the use of a paddle. A surfboard is smaller and used with the surfer lying or kneeling on the board and paddling with their arms before standing, while a paddle board is larger and used with the surfer standing on the board and paddling with a paddle.
-
Is SUP surfing easier than surfing?
⇒ SUP surfing can be easier than surfing for beginners because the larger board provides more stability, and the paddle provides more control. However, SUP surfing also requires more strength and balance to stand and paddle on the board.
-
Can you use a paddle on a surfboard?
⇒ You can use a paddle on a surfboard, but it may not be as effective or comfortable as using a paddle on a paddle board. The surfboard is smaller and less stable, and the paddle may be too long or heavy for the surfboard.

Paddle boarding on a river, combines the tranquility of floating on water with the thrill of navigating unique challenges. This guide aims to empower enthusiasts with essential skills, gear, and safety tips to ensure a fulfilling and safe experience.
Choosing the Right Paddle Board for River Paddling
When selecting a paddle board for river use, inflatable SUP are typically the best choice. Inflatable paddle boards are great for rivers because they're lighter and easier to handle than solid boards. They're not only more convenient but also better for river conditions. If they bump into rocks, unlike solid boards, they don't get damaged easily and just bounce off. This makes them a safer and more practical choice for river trips.

River Running (Downstream) Specialty Board Shapes
For River Running (Downstream) Specialty Board Shapes, apart from their wide and short structure, these river paddle boards often have durable construction to withstand impacts from rocks and debris in rapids. They may also feature reinforced rails for extra protection and stability. The deck pads on these boards are usually extensive, providing better grip in wet conditions.
- Volume and Buoyancy: These boards often have a higher volume for better buoyancy in rapid waters, aiding in keeping the paddler above water during turbulent sections.
- Attachment Points: They might come with multiple attachment points for securing gear, which is essential for longer river runs where you need to carry supplies.
- Rugged Construction: The materials used are usually more rugged to withstand the abrasive nature of river environments, ensuring longevity and durability of the board.
Tip: Practice in mild currents to get used to the board’s responsiveness before tackling more challenging rapids. Consider the weight capacity of the board. Heavier paddlers might need a board with more volume to ensure adequate buoyancy in rough water. Also, practice quick turns and stops to better navigate through rapids and obstacles.
River Surfing (Park and Play) Board Shapes
Designed for surfing river waves, these boards are shorter (6-8 feet) and moderately wide (30”-33”). They have a pronounced rocker curve for sustained planing and preventing the nose from submerging. The shape allows stability and maneuverability in river waves, with hardboards offering better carving turns but are more prone to damage.
River Surfing (Park and Play) boards are also known for their specialized fins and tail shapes, which are designed to improve maneuverability in river waves. The fins are usually shorter and more robust to withstand the rough riverbed. Additionally, these boards often have a higher volume per foot length, which helps to keep them afloat in the turbulent water conditions typical of river surfing.
- Nose and Tail Design: These boards often have specific nose and tail designs for quick responsiveness in river waves. The nose is usually upturned to avoid submerging, and the tail is shaped for sharp turns.
- Deck Texture: They may feature specialized deck textures or pads for extra grip in dynamic movements, essential for maintaining footing while navigating river waves.
- Advanced Materials: To balance durability and performance, these boards might utilize advanced composite materials or specialized coatings for impact resistance and longevity.
Tip: Focus on balance and foot placement to enhance control while surfing river waves. Practice paddling techniques specific to river surfing, like quick pivot turns and bracing strokes. These skills are essential for maintaining control and stability in dynamic river conditions. Regularly check your equipment for wear and tear, especially the fins and board surface, to ensure safety.
Crossover Shapes for Whitewater and All-Around Paddling
These river paddle boards balance the requirements of whitewater and calm water paddling. They are generally 9-11 feet long and 32-34 inches wide, with a moderate rocker profile. They offer good performance on flat water and can handle most whitewater conditions.

Crossover boards for whitewater and all-around paddling often come with additional features like multiple fin setups, allowing for customization based on the water conditions. They might also have reinforced hulls for durability and bungee tie-downs for securing gear, which is useful for longer paddling trips. These boards are a great choice for paddlers looking for versatility without specializing in one type of water condition.
- Board Flexibility: These boards often feature a balance between rigidity for flat water speed and flexibility for absorbing impacts in whitewater.
- Traction Pads: Enhanced traction pads can cover a larger area of the deck for secure footing in both calm and rough water conditions.
- Versatile Shape: The overall shape is designed to cut through calm water efficiently while still being responsive enough for whitewater maneuverability.
Tip: Choose a crossover board if you enjoy varied paddling experiences, from calm lakes to moderate rapids. Regularly experiment with different fin setups to find what works best for you in various conditions. Also, consider additional accessories like deck bags for gear storage, especially if you plan on longer or more adventurous trips.
River-Specific Fins for River Paddle Boarding
For river paddle boarding, the fin setup is crucial for optimal performance. In river conditions, shorter fins are generally used to avoid hitting the riverbed in shallow waters. These fins provide enough stability while minimizing the risk of getting stuck. In contrast, larger fins are suitable for deeper sections of a river, offering better tracking and helping the board move straighter.
It's important to choose fins that match your specific paddling environment and skill level. This setup enhances your experience, making river paddle boarding both safe and enjoyable.
Here are some of the type and size of fins:
- Short Fins: Typically less than 3 inches, these are used in shallow waters to avoid hitting the riverbed. They provide enough stability for most conditions and are ideal for quick, shallow river runs.
- Long Fins: Ranging from 5 to 9 inches, these are better for deeper waters where tracking (the ability to maintain a straight path) is essential. Larger fins help in stability during straighter, longer runs in deeper sections.
- Flexibility and Material: Some river fins are more flexible to absorb impacts with rocks or the riverbed. Materials like rubber or soft plastic are common.
The fin setup should be chosen based on the river's depth, flow speed, and your own paddling experience. Switch fins as needed to match the river conditions you encounter. Fin configuration depends on the specific river conditions:
- Shallow, Rapid Waters: Use a single short fin to prevent hitting the riverbed. This setup offers agility and is less likely to get caught on rocks.
- Deeper, Slower Rivers: A longer central fin is suitable for improved tracking and stability.
- Varied River Conditions: A versatile 2+1 fin setup (one main fin with two smaller side fins) can adapt to changing conditions, offering a balance between maneuverability and tracking.
Type of River Paddling and Skill Needed
River paddling encompasses a range of activities requiring different skill levels:

- Calm Water Paddling: Suitable for beginners, this involves paddling on gentle rivers or streams with minimal currents. Skills needed include basic paddle strokes, steering, and balance. Beginners should also learn basic safety protocols, such as how to handle unexpected falls into the water and how to navigate around natural obstacles like fallen trees or rocks.
- River Touring: For intermediate paddlers, river touring involves longer distances on rivers with mild currents and some obstacles. Skills required include efficient stroke techniques, endurance, and navigation. This level involves understanding environmental factors like wind and weather patterns, which affect river conditions. Intermediate paddlers should also be adept at reading river maps and recognizing potential hazards from a distance.
- Whitewater Paddling: Advanced paddlers take on whitewater rivers with rapids and significant obstacles. Essential skills include quick reflexes, precise maneuvering, and an understanding of river hydrodynamics. In addition to quick reflexes and maneuvering, advanced paddlers should have knowledge of advanced rescue techniques and be able to assess and respond to rapid classifications. Knowledge of river ecology and respect for the natural environment is also important.
Each type of river paddling demands specific skills that correspond to the water conditions and challenges presented. Beginners should start with calm water paddling and progressively build skills before attempting more challenging river conditions.
Identifying and Navigating River Hazards
Understanding river hazards is crucial for safety. Key hazards include:

Rapids
These are turbulent sections of the river caused by the fast flow of water over rocks or through narrow passages. Paddlers need to steer clear of rocks and maintain balance against strong currents. It's vital to wear a helmet and life jacket.
- Skill in Eddy Turns: Paddlers should practice entering and exiting eddies smoothly, as these areas can provide a safe haven in rapid waters.
- Scouting Rapids: Before tackling unknown rapids, stop and observe the flow patterns and potential routes.
- Hydraulic Features: Understand different hydraulic features like holes or standing waves in rapids, which can affect your navigation strategy.
Currents
These can swiftly change a board's direction. Understanding how to read the river and use paddle strokes to stay in control is crucial. If caught in a strong current, aim the board downstream and paddle towards calmer water.
- Cross Current Techniques: Learn how to angle your board and use powerful strokes to cross strong currents safely.
- Swimming Skills: In case you fall off, strong swimming skills can be crucial in currents.
- Downstream "V's": Look for 'V' shaped patterns indicating safer paths through currents.
Sweepers and Strainers
Sweepers are overhanging branches that can knock you off your board, while strainers, like submerged trees, can trap you underwater. Avoid paddling near them and always look ahead for potential hazards.
- High Water Caution: These hazards become more prevalent and dangerous during high water conditions.
- Escape Strategies: If caught, lean into the sweeper to avoid being pulled under and try to climb over it.
- Emergency Egress: Practice how to quickly dismount and swim to safety if you're approaching a dangerous strainer.
Depth
Shallow waters can pose a risk of hitting the riverbed, damaging the board, or causing injury. In deeper waters, be aware of the potential for stronger currents. Adjust your fin setup for the depth.
- Water Level Research: Check river depth reports before your trip. Rapidly changing water levels can drastically alter depth-related hazards.
- Variable Fin Configurations: Be prepared to adjust your fin configuration based on the depth to avoid damage to your board and ensure efficient navigation.
Changing Tides
These can influence the river’s flow and depth, especially near estuaries. Tidal changes can create unpredictable conditions, so it's important to plan your trip according to the tide schedule and be prepared for sudden changes in the water.
- Advanced Planning: Paddlers should study tidal patterns in advance and plan their trips around the safest and most favorable tide conditions.
- Impact on Wildlife and Vegetation: Be aware of how tides can affect local wildlife and vegetation, which may alter the navigability of certain areas.
In any emergency, stay calm, try to reach a safe spot, and signal for help if needed. Familiarity with your river paddle board and practicing self-rescue techniques are vital.
Critical Safety Gear for Stand Up Paddle Boarding
For river paddle boarding, the critical safety gear includes:

- Personal Flotation Device (PFD): Ensures buoyancy in the water, a must for all paddlers. Choose a PFD with mobility in mind, allowing for full range of motion while paddling. Ensure it fits snugly and is certified for water sports use.
- Helmet: Protects against head injuries from rocks or falls. Look for helmets specifically designed for water sports, providing both impact protection and water drainage.
- Appropriate Footwear: Provides grip on slippery surfaces and protects feet. Water shoes or sandals with sturdy soles are ideal. Ensure they secure well to your feet and provide protection against sharp rocks.
- Whistle: For signaling in case of emergency or to attract attention. Choose a pealess whistle, as these are more reliable in wet conditions and can be heard over long distances.
- Dry Bag: Carries emergency supplies like a first aid kit, water, and food. Select a waterproof and durable bag. Consider one with compartments or pouches for organized storage of emergency supplies.
Each piece of equipment serves a specific safety function, necessary in various situations, whether for protection, emergency signaling, or carrying essential supplies.
Emergency Protocols for River Paddling
In emergency situations while river paddle boarding, it's crucial to follow these protocols:

- Self-Rescue Techniques: Learn how to efficiently re-mount your board from the water. Practicing this in various conditions helps build confidence and speed in recovery. Also include practicing in different water conditions, such as moving water and waves, as each scenario requires different approaches to remount the board.
- Signaling for Help: A whistle should be loud and easily accessible. In remote areas, a waterproof communication device is crucial. Practice using hand signals for group paddling. Besides whistle and hand signals, consider carrying a brightly colored flag or flare for visibility in large, open areas.
- River Rescue Protocols: Familiarize yourself with common rescue techniques and signals used in river paddling. In a group, establish clear signals for help or danger. Learn about using throw ropes or bags in rescue situations and how to assist others without putting yourself at risk.
- Hypothermia Awareness: Know the signs of hypothermia and carry appropriate gear to stay warm. In cold conditions, wear a wetsuit or drysuit. Carry emergency heat packs and understand how to create makeshift insulation using available resources.
- CPR and First Aid Knowledge: Regularly update your first aid and CPR training. Your kit should include items tailored to potential river injuries. Include training on how to handle water-related injuries like cuts from rocks or symptoms of water inhalation.
- Plan Your Route: Share your route and timeline with someone trustworthy. This ensures someone is aware of your whereabouts and expected return time. Additionally, check in regularly if possible, especially if your route or conditions change.
River Paddle Board with iROCKER
Embarking on a paddle board river adventure is not just about the thrill; it's a journey that combines skill, respect for nature, and the joy of exploration. With the right skills, gear, and awareness, you can safely enjoy the unique challenges and beauty of river paddling. Visit iROCKER to find the right paddle board and start your own adventure!
FAQs
Can you SUP on a river?
Yes, stand-up paddle boarding on a river is possible and enjoyable with the right skills and equipment. It's important to choose a river suitable for your skill level and have appropriate river paddle board gear.
How to paddle board on a river?
Begin on calm river sections, focusing on balance and basic paddling techniques. As your skills improve, you can progress to more challenging parts of the river, adapting to currents and learning to navigate obstacles.
Is it hard to paddle board on a river?
Paddling on a river can be more challenging than on calm waters due to factors like currents, rapids, and obstacles. However, with practice, it becomes a thrilling and rewarding experience.
Can you paddle board through rapids?
Paddle boarding through rapids is possible but requires advanced skills, experience, and specific safety gear. It's crucial to understand rapid navigation, self-rescue techniques, and have the right river paddle board and equipment.

Discover the joys of paddle boarding in PEI (Prince Edward Island), the place that has stunning beaches and peaceful rivers and stands as a hidden gem for water sports enthusiasts. Whether you're just starting out or you're an experienced paddler, the island’s diverse and beautiful locations offer something special for everyone. Join us as we explore the top 10 places for paddle boarding in PEI, showcasing the island’s natural beauty and offering an unforgettable experience on the water. Let’s dive into these amazing spots and see what makes paddle boarding PEI so special.
DISCLAIMER: Before traveling to a paddle location, ensure that the location still allows for paddle boarding and make yourself aware of any rules and regulations in place.
1. Cavendish Beach
Cavendish Beach, with its calm, shallow waters, is a delightful spot to set off on a paddle boarding adventure. As you paddle along the coastline, there are alluring sights awaiting you - the vibrant red sands, the lush green cliffs, and landmarks of blue water.

source: freepik
The contrast of the red sand against the lush green cliffs and blue ocean waters creates a breathtaking backdrop, enriching your adventure. With essential amenities available, Cavendish Beach offers a comfortable and enjoyable day for paddle boarders of all ages and skill levels. It is also renowned for its literary connection to 'Anne of Green Gables', which makes Cavendish Beach a special place for a memorable paddle boarding experience.
- Time to get there: Take 40 minutes from Charlottetown.
- Water type: Ocean, shallow and warm.
- Skills: Ideal for beginners and family-friendly.
- Launch points: Cavendish Beach Adventure Zone or Shining Waters Family Fun Park.
- Amenities: Near the main beach entrance, visitors can find safe parking, accessible washrooms, and showers. Scattered picnic areas around the beach offer ideal spots for relaxation.
- Unique feature: The stunning visual combination of red sand, green cliffs, and blue water.
2. Rustico Bay
Rustico Bay is a large bay on the north shore of PEI, with several small islands, coves, and inlets to explore that appeals to paddlers of all levels.
As you paddle through Rustico Bay, you're greeted with stunning views of rolling hills and quaint fishing villages, adding a unique charm to your experience. Whether you're gliding gently along the coastline or exploring the numerous coves and inlets, Rustico Bay provides an authentic and serene paddling experience that combines the essence of paddle boarding PEI.
- Time to get there: It takes 30 minutes from Charlottetown.
- Water type: Bay, calm and clear.
- Skills: Suitable for all levels.
- Launch points: Rustico Harbour, North Rustico Beach, or Robinsons Island.
- Unique feature: Breathtaking views of rolling hills and charming fishing villages.
3. Brudenell River Provincial Park
Brudenell River Provincial Park in Prince Edward Island located a mere 50 minutes from Charlottetown, is a picturesque escape into the heart of nature.

The Brudenell River, with its calm, deep, and wide waters, offers an idyllic setting for paddlers seeking a tranquil experience. As you paddle along the river, you're greeted by a peaceful mix of green forests and meadows. Originally made for paddle boarding, the park offers a variety of other activities as well. For those who seek a longer outdoor adventure, the camping spots, cozy cottages, golf courses, and a restaurant here are awaits. Brudenell River Provincial Park is a must-visit destination for anyone looking to explore the peaceful and scenic side of paddle boarding PEI.
- Time to get there: 50 minutes from Charlottetown.
- Water type: River, calm, deep, and wide.
- Skills: Suitable for all levels.
- Launch points: Park’s marina or Brudenell River Resort.
- Amenities: A 25-site RV park with Wi-Fi, wooded tent sites, cozy cottages, two 18-hole championship golf courses, and various dining options, all within easy reach from the main entrance.
- Unique features: Lush forests, grassy meadows, winding river.
4. St. Peters Bay
St. Peters Bay is an expansive bay that connects to the Gulf of St. Lawrence and the Northumberland Strait, presenting a dynamic paddling environment. As you glide across the waters of St. Peters Bay, you're treated to a mix of calm and occasionally choppy conditions, perfect for paddle boarders who appreciate a bit of variety.
The bay opens up to the breathtaking Greenwich Peninsula, a part of the PEI National Park known for its pristine beaches, lush dunes, and scenic trails. For nature lovers and bird watchers, the bay offers an unforgettable paddle boarding PEIexperience as the water is smooth, deep, and blue, and the views are spectacular.
- Time to get there: 40 minutes from Charlottetown.
- Water type: Bay, a mix of calm and choppy conditions
- Skills: Suitable for all levels.
- Launch points: St. Peters Landing or Greenwich Beach.
- Amenities: None, offering an unspoiled natural experience.
- Unique feature: Access to the Greenwich Peninsula and part of the PEI National Park.
5. Basin Head Provincial Park
Basin Head Provincial Park, with its stunning white sand beach, charming bridge, and vibrant lagoon, offers a lively and delightful paddle boarding experience.\

source: freepik
The area boasts waters that are both warm and clear, with a shallow depth that accommodates everyone from first-time paddlers to experts. As you launch your board from the beach or the bridge, you can explore the tranquil lagoon, a habitat teeming with fish, seaweed, and sandpipers, adding an element of nature watching to your adventure. The beach itself is a paddle boarding PEI hub of activity, buzzing with energy and vibrancy.
- Time to get there: Approximately 80 minutes from Charlottetown.
- Water type: Ocean, warm, clear, and shallow.
- Skills: Ideal for all levels, from beginners to seasoned paddlers.
- Launch points: Beach or the bridge in the park.
- Amenities: Washrooms, showers, changing rooms, and a snack bar are conveniently located at the park's main entrance, with picnic tables nearby for easy access and relaxation.
- Unique feature: Vibrant lagoon with rich marine life and lively beach atmosphere.
- Additional Services: Guided tours are available from Basin Head Paddle.
6. North Rustico Harbour
North Rustico Harbour is a historical and picturesque harbour offering a unique blend of calm and exposed waters that paddlers of all skill levels will find ideal. In contrast, the adjacent open waters of the Gulf of St. Lawrence present a more challenging and exhilarating adventure for more experienced boarders.
As you navigate the waters of North Rustico Harbour, you're greeted with the iconic scenery of PEI—red cliffs, charming lighthouses, and traditional fishing boats dotting the coastline. The harbour offers convenient launch points, both from within the harbour itself and from the nearby North Rustico Beach.
- Time to get there: 30 minutes from Charlottetown.
- Water type: Combination of calm harbour and exposed ocean waters.
- Skills: Suitable for all levels, from beginners to advanced paddlers.
- Launch points: North Rustico Harbour or North Rustico Beach.
- Amenities: Limited, focusing on the natural and authentic paddling experience.
- Unique feature: Picturesque views of red cliffs, lighthouses, and traditional fishing boats.
7. Murray Harbour
Enveloped by beautiful farmland and lush woodlands, Murray Harbour offers a peaceful retreat for paddle boarders. The calm waters of the harbour and the gentle flow of this place provide an ideal setting for paddlers of all skill levels and ages.

source: freepik
As you paddle through Murray Harbour, you become immersed in the essence of rural paddle boarding PEI, with its scenic beauty and abundant wildlife. The area is a haven for nature lovers, offering sightings of ducks, geese, and beavers, adding a delightful aspect of wildlife watching to your paddle boarding experience. The gentle pace of life and the unspoiled natural surroundings in Murray Harbour create an environment where you can truly disconnect and enjoy the tranquillity of the water.
- Time to get there: 70 minutes from Charlottetown.
- Water type: Calm harbour and serene river waters.
- Skills: Ideal for paddlers of all levels.
- Launch points: Murray Harbour Wharf or Beach Point Provincial Park.
- Unique feature: Breathtaking views of rural landscapes and abundant wildlife.
8. Northumberland Strait
The Northumberland Strait, a breathtaking and inviting body of water, is a jewel in the crown of paddle boarding PEI and is also famous for having some of the warmest waters in Canada.
Starting from Charlottetown or any other place, each trip to the strait reveals a different, stunning landscape perfect for paddle boarders at all skill levels. Along the adventure, the shoreline presents a serene backdrop, complete with picturesque beaches, quaint cottages, and captivating lighthouses. A highlight of paddle boarding in the Northumberland Strait is the breathtaking sunsets. They paint the sky with bright, beautiful colours, making your experience even more magical.
- Water type: Warm and scenic strait.
- Skills: Ideal for all levels of paddle boarders.
- Launch points: Various, including Wood Islands, Argyle Shore, or Chelton Beach.
- Unique feature: Exceptional sunset views and warm waters.
9. Victoria-by-the-Sea
Victoria-by-the-Sea, nestled on Prince Edward Island's south shore, captivates paddle boarding enthusiasts with its charm and serene waters. The calm harbour and adjacent ocean waters welcome paddle boarders of all skill levels, inviting them to explore and enjoy at their leisure.

source: unsplash
Launching from Victoria Harbour or Victoria Beach, you can immerse yourself in the tranquil environment, perfect for a peaceful paddle boarding session. The village's charm enhances your experience, with the opportunity to navigate around the Tryon Shoal or simply soak in the sights of the quaint lighthouse, chocolate factory, and local theatre. It's an experience that beautifully blends paddle boarding with a taste of local culture and history.
- Time to get there: 30 minutes from Charlottetown.
- Water type: Calm harbour and ocean waters.
- Skills: Ideal for all paddle boarding levels.
- Launch points: Victoria Harbour or Victoria Beach.
- Unique feature: The village's ancient atmosphere features a lighthouse, chocolate factory, and theatre.
10. Covehead Bay
Covehead Bay, located a mere 20 minutes from Charlottetown, is part of the renowned PEI National Park and a must-visit for paddle boarding enthusiasts. Setting out on your paddle boarding adventure in this large and shallow bay, the breathtaking scenery of the sand dunes and the famous Covehead Lighthouse will captivate you.
The bay offers a tranquil atmosphere ideal for a calm paddling experience, enabling you to smoothly sail across the water and absorb the area's natural charm. For a more lively experience, you can head out to Covehead Harbour, which bustles with fishing boats, sailboats, and tour boats, adding a dynamic element to your adventure.
- Time to get there: A brief 20-minute journey from Charlottetown.
- Water type: Bay and ocean, calm and clear.
- Skills: Suitable for all paddle boarding levels.
- Launch points: Covehead Wharf or Stanhope Beach.
- Unique feature: Stunning views of sand dunes and Covehead Lighthouse.
After paddling your way through the top paddle boarding destinations in PEI, each offering its own unique charm and beauty, it's time to consider where to unwind and rest after a day out on the water.
Where to Stay While Paddle Boarding PEI?
Planning a paddle boarding adventure in Prince Edward Island is also about choosing the right place to stay and relax after paddle boarding PEI all day. From cozy campsites to luxurious resorts, here are some excellent choices:
- Cavendish Bosom Buddies: A family-friendly resort, located near the scenic Cavendish Beach, offers well-equipped cottages and suites. Guests can enjoy ocean views, full kitchens, and fireplaces. It includes a heated pool, a playground, and a fire pit, perfect for unwinding after a day of paddle boarding.
- Dalvay by the Sea: Situated on a sprawling 120-acre estate overlooking the Gulf of St. Lawrence and close to Brudenell River Provincial Park, this historic and elegant hotel is a dream for nature lovers and paddle boarders. Guests can enjoy amenities like a restaurant, a tennis court, and bike rentals.
- The Gables of PEI: For a touch of luxury, The Gables of PEI, near Rustico Bay, offers a unique experience. This resort features villas and townhouses equipped with modern amenities like hot tubs, fireplaces, and BBQs. It is an ideal location for those looking to explore the diverse paddle boarding opportunities at Rustico Bay. The resort also boasts a golf course, a pool, and a fitness center, and provides rental and tour services through Outside Expeditions and Paddle PEI.
Each of these accommodations ensures that your paddle boarding PEI trip is comfortable, enjoyable, and memorable.
Paddle Boarding in PEI
Paddle boarding in PEI is an exhilarating adventure and a profound way to connect with nature's pristine beauty. Each paddle boarding spot in PEI, from Canvendish Beach to Covehead Bay, is a gateway to unique experiences, ensuring that each venture is as enriching and memorable as the ones before.
For the optimal experience, consider iROCKER paddle boards, with their dependability and flexibility, perfectly suited for the diverse waters of PEI. Seize an iROCKER paddle board now and launch into your thrilling paddle boarding PEI escapade. The waves of adventure are calling – answer with your paddle in hand!

Whistler is a world-famous skiing, snowboarding, biking, and hiking destination. But did you know that it is also a paddle boarder’s paradise? With six stunning lakes and a scenic river to explore, Whistler offers a variety of options for stand up paddle boarding enthusiasts of all levels. Whether you are looking for a relaxing float, a challenging workout, or a wildlife adventure, you will find it in Whistler. In this guide, we will introduce you to the 6 best spots for paddle boarding Whistler and give you some tips on making the most of your experience.
DISCLAIMER: Before traveling to a paddle location, ensure that the location still allows for paddle boarding and make yourself aware of any rules and regulations in place.
1. Alta Lake
Alta Lake is a fantastic place to paddle board in Whistler, at just over 2km in length, there is plenty to explore.

source: unsplash
Alta Lake is also the second largest and most famous lake in Whistler, located just a few minutes from the village. It offers spectacular views of the mountains with wonderful views of both Whistler and Blackcomb as you paddle out to the centre of Alta Lake. Local lake regulations are enforced strictly, with fines for non-compliance, such as not wearing life jackets or carrying a whistle. Each park has its own amenities, such as picnic tables, washrooms, docks, and rentals. You can paddle around the lake and explore its many bays and islands or venture into the River of Golden Dreams, which connects Alta Lake to Green Lake.
Water Type: Freshwater lake, calm and clear.
Skills: Suitable for beginners and intermediate paddlers.
Launch Point:
- Lakeside Park: Lakeside Park is on the southeast side of the lake and has a small parking area, a beach, floating docks, and a grassy area.
- Wayside Park: Head towards "Fishermans" or Wayside Park and enjoy the Whistler Art on the Lake festival with live music and local art.
- Rainbow Park: On the northwest side of Rainbow Park, you can find several docks, a car park, volleyball nets, and food trucks during summer. This area provides the easiest access point for the River of Golden Dreams.
- Blueberry docks: Not too far from Lakeside Park, it is a great spot to paddle across to the Sailing Club. This is also a Whistler locals spot accessed from St. Anton Way. A forest trail leads to docks perfect for paddle board launch, just a 5-minute walk away.
Amenities: Parking, washrooms, picnic tables, docks, rentals, and food trucks, but you should bring a dry bag and waterproof SUP bag to store your clothes, snacks and valuables.
Unique Feature: Alta Lake is very windy in the afternoon due to the temperature differential along the valley floor. It's important to note that you should paddle upwind for the first leg of your journey, and the return leg will be easier.
2. Green Lake
Paddle boarding in Whistler on Green Lake is a must-do experience. The lake offers stunning natural beauty with the backdrop of Wedge Mountain, the highest peak in Garibaldi National Park, and the hanging glacier of Weart Mountain.
Green Lake is the largest and coldest lake in Whistler. It is fed by glacial runoff, which gives it a distinctive green hue. Green Lake is located north of the village and has a launch point at Green Lake Park. You can paddle along the shoreline and admire the scenery or head to the east side of the lake and explore the ghost town of Parkhurst, an abandoned logging settlement. It can get chilly, so bundle up! Green Lake is also a great spot for fishing, as it is home to rainbow trout, kokanee, and dolly varden. You should bring a base layer to stay warm against the cool breeze.
Water Type: Freshwater lake, cold and deep.
Skills: Suitable for intermediate and advanced paddlers. If you are an experienced paddle boarder, you can paddle down the River of Golden Dreams from Alta Lake to Green Lake, an experience worth having on its own.
Launch Point:
- Green Lake Park is easily accessible from the Sea to Sky Highway. You can either go to the Green Lake Boat Launch or Green Lake Park, both of which have limited parking spaces. You can enjoy the beauty of the dense forest and mountains while relaxing on your SUP on the lake.
- Fitzsimmons Fan Park is 2 km south of the lake and is a beautiful sandy beach for a paddle board rest stop. This hidden gem is popular among fly fishermen and beach lovers.
Unique Feature:
- The ghost town of Parkhurst is a historical site with old buildings and artefacts.
- Head north on Green Lake to reach the jumping cliffs; here, you can test your bravery with cliffs of all sizes. Be sure to check the water depth before jumping, though!
3. Lost Lake
If you are looking for a place to enjoy paddle boarding and other outdoor activities in Whistler, you should check out Lost Lake. It is a small lake close to the village and can be reached by walking, biking, or taking a free shuttle.

source: unsplash
Lost Lake is perfect for warm water enthusiasts, as it heats up quickly and has a sandy beach and a grassy park. You can paddle around the lake and admire the views or dock at Canine Cove, a designated area for dogs to play with a ramp on the dock. Lost Lake is also ideal for family paddle boarding, as it is not affected by heavy winds and has a shallow shore. Besides paddle boarding, you can enjoy swimming, sunbathing, and picnicking at Lost Lake or explore the surrounding trails for mountain biking and wildlife watching.
Water Type: Freshwater lake, warm and shallow.
Skills: Suitable for beginners and intermediate paddlers.
Launch Point:
- Lost Lake Park is where you can rent paddle boards and other watercraft.
- On the other side of the lake, you'll find a long, extended dock where you can anchor and hang out. Many people often sunbathe here.
Amenities: At the lakeside, you'll find excellent facilities. There are public toilets, picnic tables, and a covered area. It's free, but first come, first served. If tables are full, use a picnic blanket and inflate your paddle board by the water.
Unique Feature:
- The wetlands are a rich habitat for birds, frogs, beavers, and fish.
- In July and August, you can observe the magnificent toad migration at Lost Lake, where toads will move from water to forest. Don't miss out on this extraordinary sight!
- There is a specific area for dogs to play. The dock has a purpose-built ramp so dogs can easily swim and get back onto the dock.
- Parking is restricted to drop-off only for most of the day. During summer (June to September), a free shuttle service is available from the village to the lake. Get more details on Whistler.ca.
4. Alpha Lake
Alpha Lake is a small, quiet lake located south of the village in the Creekside area. It is a hidden gem that offers a peaceful escape from the crowds.
Alpha Lake has a launch point at Alpha Lake Park, where you can also find a playground, a tennis court, and a dog beach. You can paddle around the lake and enjoy the tranquillity or head to the north end of the lake and visit the train wreck, a collection of graffiti-covered boxcars that derailed in 1956.
Water Type: Freshwater lake, calm and clear.
Skills: Alpha Lake is a great option for warm water paddling, as it is sheltered from the wind. This makes it a good choice for less experienced paddlers.
Launch Point:
- Alpha Lake Park has a dock that facilitates boat launching for easy access.
- Pine Point Park is an area where you can relax in the warm sunlight after paddle boarding.
- Condy Park.
Amenities: Parking, washrooms, and Alpha Lake Park also offer basketball and tennis courts, a fenced dog walking area, and family-friendly activities on and off the land. At the park, there are tables for relaxing, and if you have kids, there's a kids’ play area.
Unique Feature:
- The train wreck is a colorful and quirky attraction.
- Once you're in the water, you can swim directly across the lake, and you'll be able to spot several cliffs. This is a very popular spot for cliff jumping in Whistler. One of the cliffs even has a ramp for bikes! However, before taking the leap, it's essential to check the water depths to ensure your safety.
5. Nita Lake
Nita Lake is a small, serene lake in the Creekside area south of the village. Located right next to Alpha Lake, it can be reached from the same car park.

source: freepik
The lake is quiet and peaceful, as it is tucked away between the trail and the railway line. However, it can also be windy, so be prepared for some waves.
Water Type: Freshwater lake, calm and clear.
Skills: Suitable for beginners and intermediate paddlers.
Launch Point: Alpha Lake Park. Or, to paddle to Nita Lake, use the boat launch directly in front of the patio behind Nita Lake Lodge on the valley trail.
Amenities:
- The area features parking, washrooms, picnic tables, and a dock for convenience and enjoyment.
- Nearby, you can easily find hotels, spas, and restaurants for additional leisure and dining options.
Unique Feature: Nita Lake Lodge, an upscale resort with a lakeside patio and a spa, is a great place for a romantic paddle, surrounded by luxury hotels, spas, and restaurants. You can paddle around the lake, admire the views or dock at Nita Lake Lodge, and treat yourself to a meal or massage.
6. River of Golden Dreams
The River of Golden Dreams is a short and scenic river that connects Alta Lake to Green Lake. It is one of the most popular and is an adventurous spot for paddle boarding in Whistler, as it offers a unique and diverse experience.
The river flows through a variety of landscapes, such as meadows, forests, wetlands, and rapids. You can see and hear a lot of wildlife, such as birds, fish, beavers, and bears. The river takes about 3 hours to paddle, depending on the water level and your speed. You can start from Alta Lake and end at Green Lake, or vice versa.
Water Type: Freshwater river, varying from slow and smooth to fast and choppy.
Skills: Suitable for intermediate and advanced paddlers.
Launch Point: Lakeside Park or Green Lake Park. There are several stops along the way if you decide it’s not for you and you’d like to exit, one at Lorimer Road.
Amenities: There are parking, washrooms, picnic tables, docks, and rentals. However, you should use waterproof bags to pack enough food and water on your paddle board with enough gear for the day.
Unique Feature:
- The diversity of the river changes from calm to wild and from open to narrow. Water levels vary by season.
- In early spring, snow melts fast; high water may require portage. There is signage along the river, so keep an eye out for these along the way. In late season, low water may also necessitate portage.
Paddle Boarding Tours and Activities in Whistler
If you want to have the best experience while paddle boarding in Whistler, you might want to join a guided tour or try some other activities. There are many options to choose from, depending on your preferences and budget. Here are some of the best paddle boarding tours and activities in Whistler:
- Backroads Whistler: This company offers guided tours on the River of Golden Dreams, as well as rentals and self-guided tours. You can choose from different types of watercraft, such as canoes, kayaks, and paddle boards. You can also opt for a wildlife tour at Twilight Tour, which lets you see the river in a different light.
- Whistler Eco Tours: Immerse yourself in guided tours on Alta Lake, Green Lake, and the picturesque River of Golden Dreams with Whistler Eco Tours. Offering a selection of watercraft, including canoes, kayaks, and paddle boards, you can embark on an exploration suited to your preferences. If you seek a group experience, consider the voyageur canoe tour, accommodating up to 8 participants.
- Whistler Stand-Up Paddle Boarding: Elevate your paddle boarding skills with lessons, tours, and rentals offered by Whistler Stand-Up Paddle Boarding on Alta Lake, Lost Lake, and Nita Lake. Whether you are a novice looking to grasp the basics or an experienced paddler seeking advanced techniques, they cater to all levels. Join a yoga or fitness class on the serene waters or opt for a scenic sunset or moonlight tour to make the most of your Whistler paddle boarding adventure.
Kayaking in Whistler
If you prefer kayaking over paddle boarding whistler, you will be happy to know that all the spots mentioned above are also suitable for kayaking. You can rent a kayak at any of the parks or shops or bring your own. You can paddle on the lakes or the river and enjoy the same scenery and wildlife. Kayaking is a great way to explore Whistler’s waterways and a fun activity for all ages and abilities.

source: unsplash
However, if you don’t want to miss out on the paddle boarding experience, you can have the best of both worlds with a kayak attachment. This is a device that allows you to convert your paddle board into a kayak and vice versa. You can easily switch between the two modes, depending on your mood and the water conditions. You can find our SUP Kayak Conversion Kit, which offer the perfect combination of kayaking and stand-up paddle boarding for the ultimate adventure!
Paddling Time!
Paddle boarding is one of the best ways to enjoy Whistler’s natural beauty and outdoor lifestyle. With six amazing spots to choose from, you will never run out of places to paddle and things to see. Whether you are a beginner or a pro, a solo traveler or a family, a thrill-seeker or a chill-seeker, you will find a paddle boarding spot that suits you. And with a kayak attachment, you can also enjoy kayaking without any hassle. So what are you waiting for? Experience the joy of paddle boarding Whistler. Grab your paddle board and head to Whistler. You won’t regret it.